This post is part of a series on how we built our website. In Part 1 we provided insights why we started a redesign of our site in the first place, and what the process looked like. This is Part 2, which will focus on the GeneratePress theme and how it plays together with Elementor. In Part 3, we focus on Elementor, sharing the learnings made while building this site.
That our new website will be built on WordPress, the CMS we had the most experience with, was pretty clear early on. Apart from that, we took a look at different themes and page builders, before the decision was made to go with GeneratePress (Theme), and Elementor (Plugin / WYSIWYG Pagebuilder).

In this post, I will give a basic introduction to GeneratePress. This is not a detailed tutorial on how to use GeneratePress, but more a high-level introduction and how we use it to play perfectly together with Elementor.
It was the first project we used this theme for and we learned a lot. In a separate post, I will go into detail on how we used Elementor to design our website.
GeneratePress is one of the most used themes with WordPress. It is easy to configure and has a “barebone” feel, it does not come with any overhead (like page builder components) which we don’t need and perfectly fits with Elementor page builder.
I have added links to specific support threads I started and the official GeneratePress docs. That way you can go into full detail on specific things you are more interested in.
For the rest of this post: GeneratePress = GP
Layout and Design Basics
You can think of our set up like this: GP is used to define some ground rules for our site, and Elementor is used to work on content and the design of the site.
We use GeneratePress for the following:
- Basic layout settings like content container width
- Primary navigation and footer content
- Default colors and font sizes
- Design for single blog post view
I will go into detail how GP is configured here on freshvanroot.com. I want you to get a feeling of how things can be done with the theme to play together with Elementor.
Basic Layout Settings
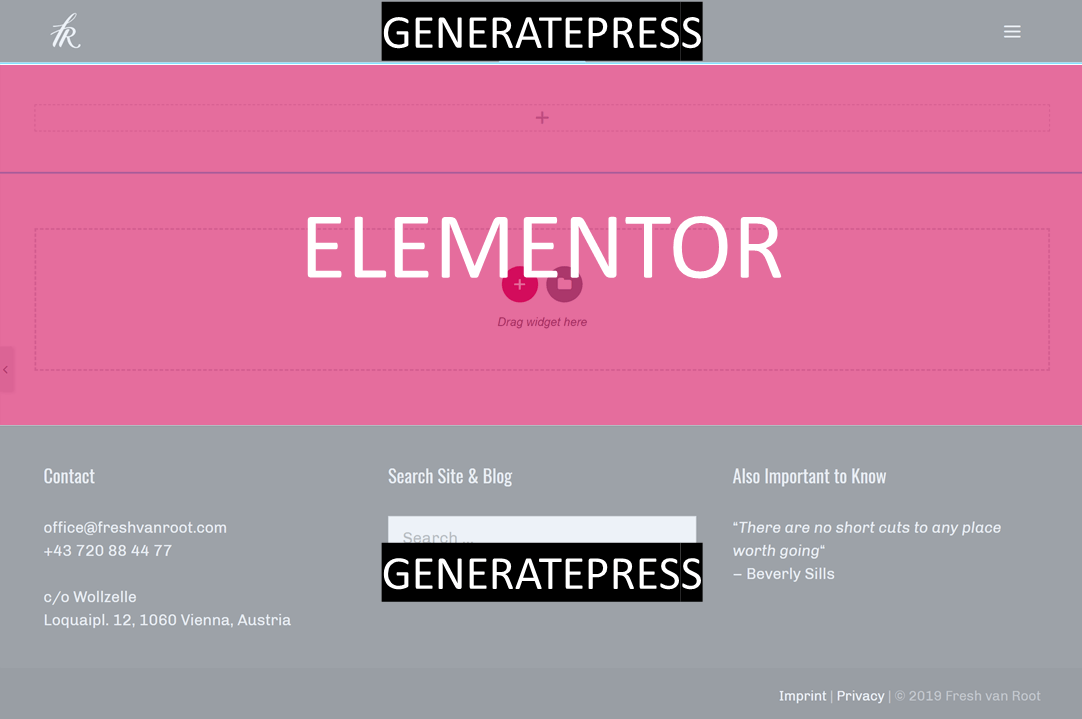
Our Primary Navigation and Footer are rendered by the theme, not Elementor. This set up allows us to add whatever we want between header and footer, if we decide to do so at a later time, and for rendering content we are not fully dependent on Elementor.
How can you disable certain things to get displayed in GP?
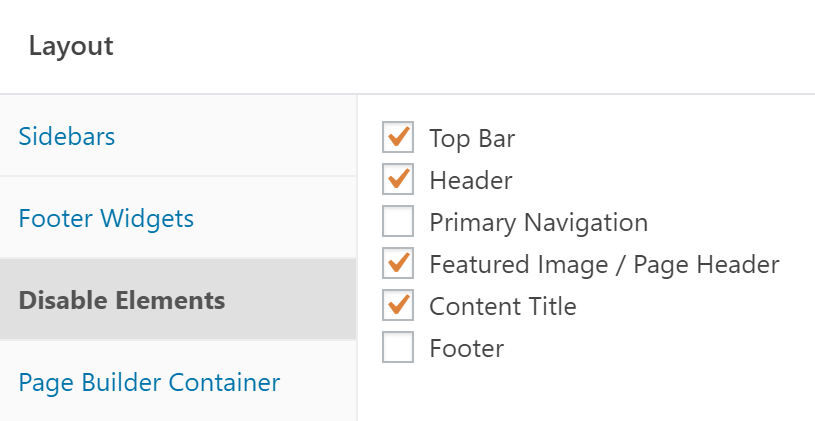
For our site, we do not want any sidebars, headers, site titles and so on displayed on pages or posts. GP provides an easy way to disable certain elements on page level or setting default for the whole site.
You can disable whatever elements you want to at page level, like shown in the screenshot below. The defaults for this can be set in the customize view in WordPress.
This is the very basic set up for all our static pages. Everything between Navigation and Footer is edited in Elementor Page builder.
Defining the overall site width
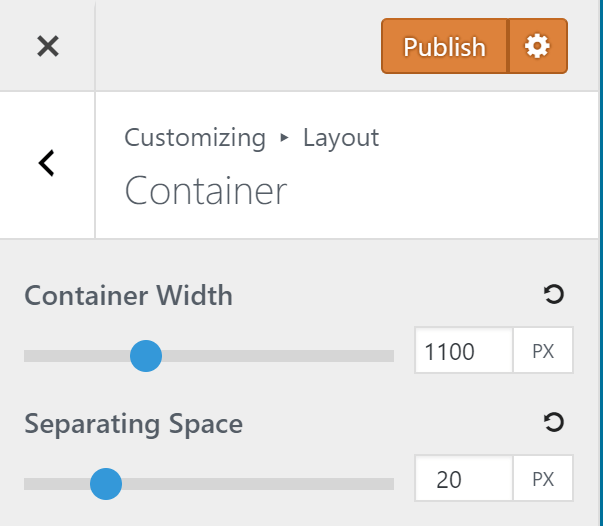
GeneratePress integrates perfectly well with the classic WordPress Dashboard. Most of the layout options can be configured within the classic Customize Panel in WordPress. One specific setting I want to point out is the Container width, which is set to 1100px for this site here. These 1100 pixels width between navigation and footer are the playground area for Elementor.
“Burger” Navigation
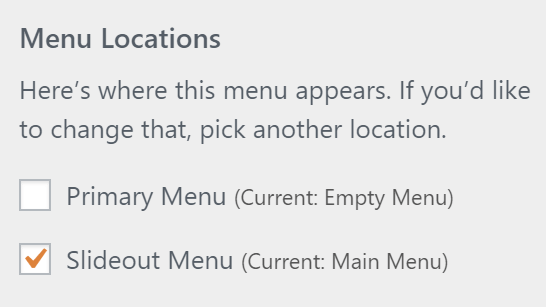
We decided to go with a “burger” navigation all the time, not only on mobile. Our site does not need much navigating around anyway, its only ~10 pages and most of traffic is happening inside the blog page.
To get this result just leave the primary menu empty, select your primary menu as secondary navigation. See my GP support request for full details.
[UPDATE] We changed the behaviour of our menu. On desktop, we now show only two items. “Agency” and “Blog”. The thinking behind that decision is that we cater to two different audiences and want to make it easier to find there way around.
Our international readers (who may not be interested in our in person workshops or case studies), can get to the blog with one click, instead of opening the burger navi and having way more options to scan.
The only way to get to our sub sites like our Contact Page or Work is via our frontpage.

Customizing the blog
Blog posts are bringing the traffic to our site, not our static pages. It was important for us that blog posts are dependent on the theme, not on the page builder. I recommend to not use pagebuilders for blogging, because if you ever decide to migrate to another theme or even CMS it will be much harder to migrate your content. Going with the default (now Gutenberg) editor for blogging and its default elements is the safe path.
Our blog overview page is created with Elementor, but the design of our single blog view is managed via GeneratePress.

We like the single post view of the “volume” template, so we imported the template on a test site and took a look at the specific options and CSS that influenced the post view (a simple procedure I recommend to learn of how certain things can be customized).
The CSS is added to customize the width of the blog content container (that is smaller to the rest of the site to make it easier to read) and some other basics. To change how the single post header looks you need to use the Elements feature of GeneratePress.
- My support thread with GP: Applying blog style from page templates
Customizing the blog header with GP Elements
WordPress, GeneratePress, Elementor and Elements, it can all be a bit confusing. GP Elements has nothing to do with Elementor or any other page builder. Elements is a feature of GP that allows further customizing and tweaking your site. This is very powerful. We use this feature to change the design of the header on our posts and frontpage, and add Google Analytics tracking code.
Elements can be used for applying specific layouts, customizing headers, or adding hooks (shortcodes, tracking pixel, java script, …). Options configured in elements can be applied so specific pages or posts. A few examples what GP elements can be used for:
- Header: You want to display a specific header image only for posts published in a specific category
- Layout: Hide header and footer on specific pages (i.e. a campaign landing page)
- Hook: Add the Twitter tracking pixel on a sales page
- …
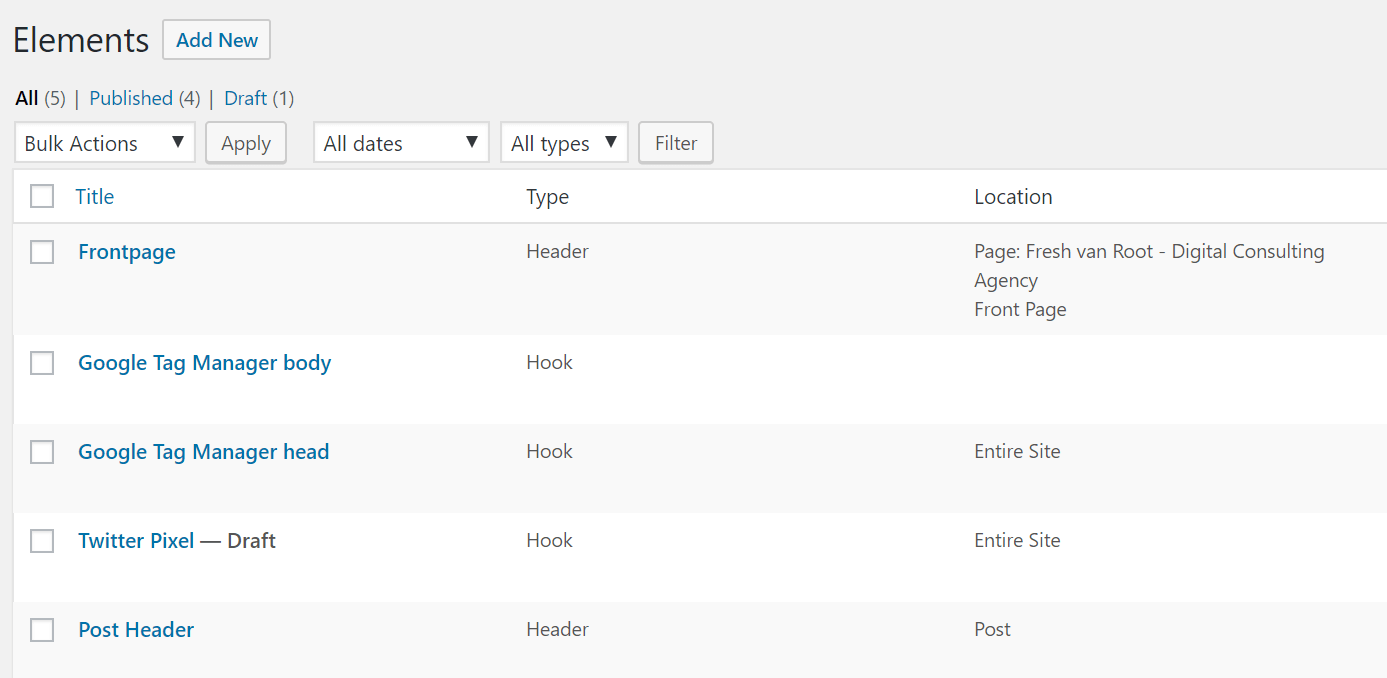
Pro tip: dont forget to use the “internal notes” tab when creating elements If you use this a lot it will be much easier later on to figure out what the element is used for.
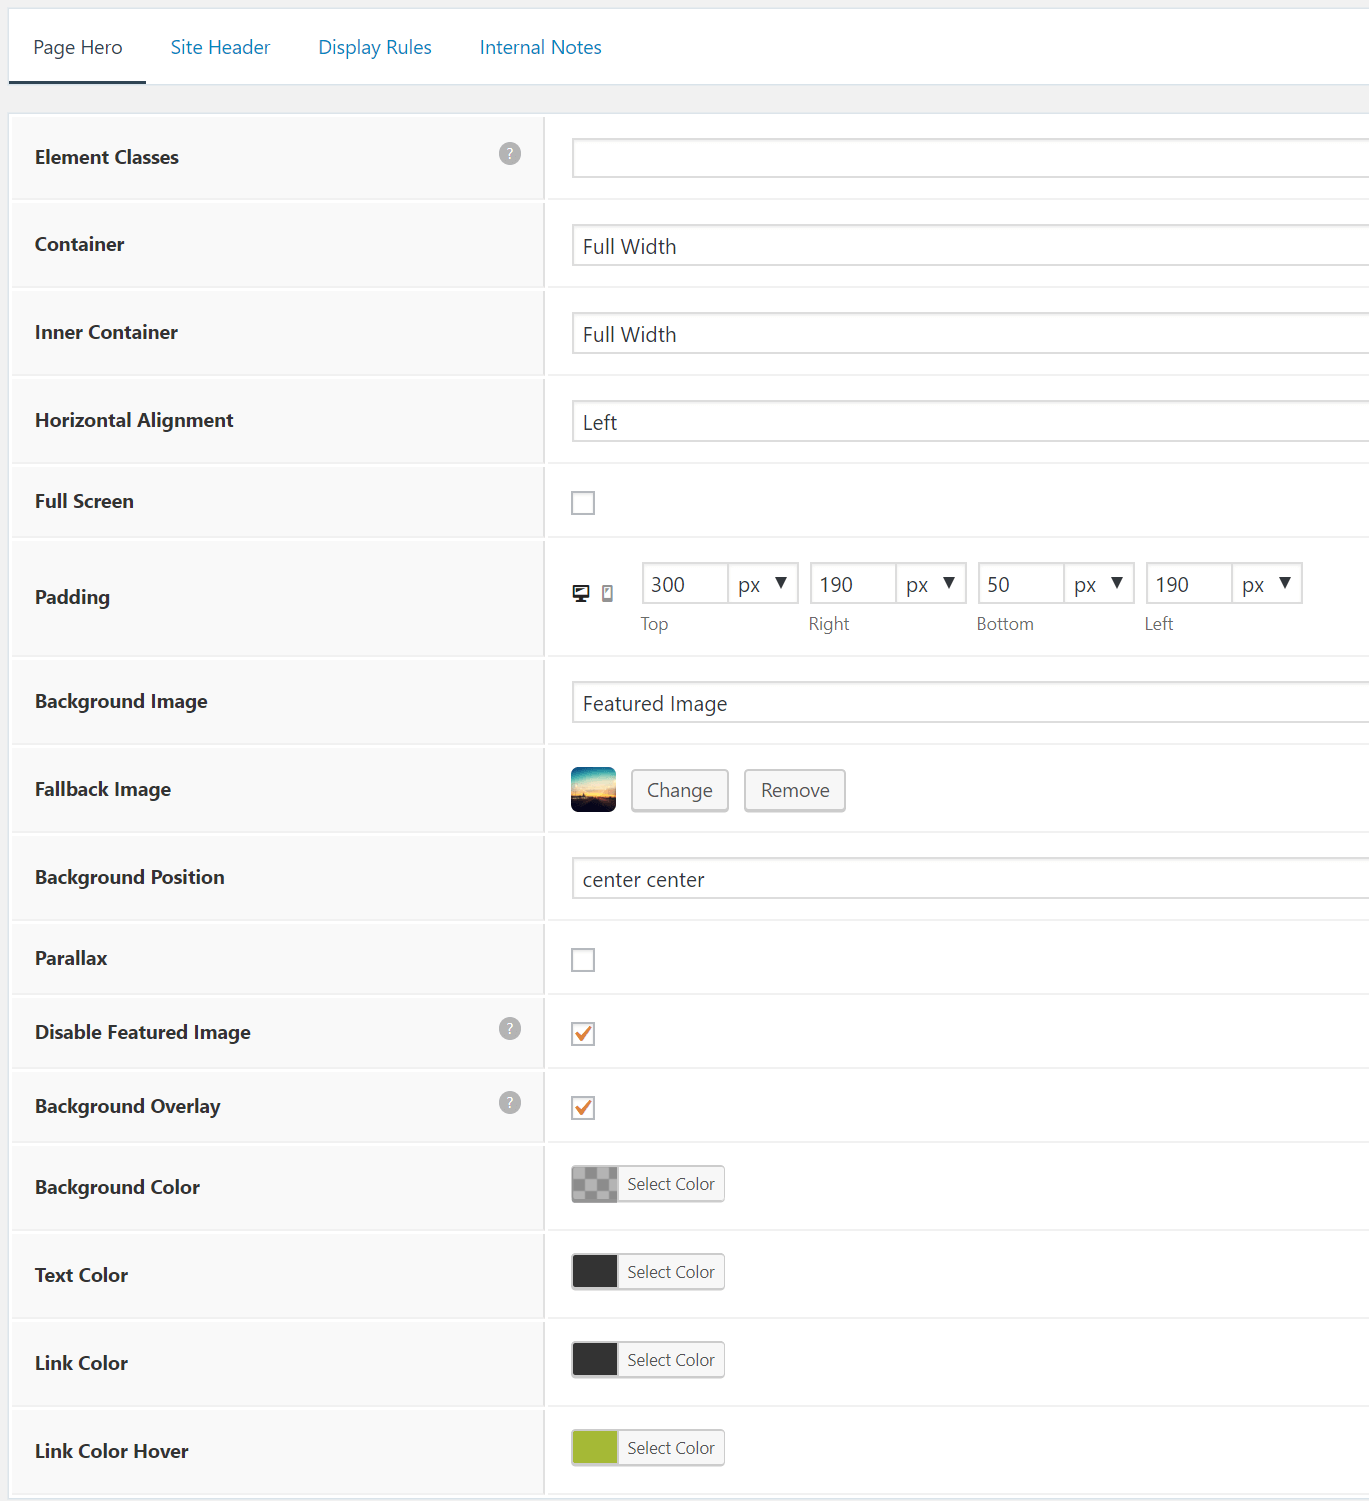
Our blog header should look very classic, and GP allows it to easily get there. It involved only a little HTML + CSS, and some of the options are shown in this screenshot to get there.
- My support thread on GP forum: Blog content width and page header same width
[UPDATE] We still use the WordPress editor for blogging, but our blog single layout is now also made in Elementor. Elementor Pro comes with a Theme Builder. You can build your own blog template and set certain display conditions. That would allow to have a different design for posts in different categories, as an example. You can learn more about how to get started with Elementor theme designer in our blog post “How to create a floating sticky sidebar in Elementor“.
Support For GeneratePress
Is Excellent! Whenever I had a question about a specific feature, how to change a layout, etc I got answers within hours. Their support team even helped me to fix problems that were not related to GP. Here is the full list of support requests I opened while working on this site:
- Make burger / mobile menu the default
- Single Post Layout
- Blog content width and page header same width
- Header padding on mobile
- Hide “Menu” next to burger navigation
- transparent header on frontpage
- Home Link – best practice for combining business page with blog
- Applying blog style from page templates
- Using GP Pro on staging site
- Styling Headlines CSS – tool?
- Single post header merged – width for headline like content
- Post Header – single Posts – custom padding / margin
Getting Started with GeneratePress
This post just gave you a quick overview of the very basic concept of GeneratePress, we only use a small subset of the features this theme offers because we use Elementor as page builder on top of it. If your goal is to create a good looking, fast site, and you do not need sophisticated design elements a page builder like Elementor offers (or lack the web design skills), you may consider building your complete site using GeneratePress. Take a look at the GP site library to see what GP can do out of the box.
You should get GP Premium! Site library, elements and more advanced customizations are only available with the paid version of the theme.
I am happy we decided to go with GP for our relaunch project and we are looking forward to
Check Out our follow up post: More ways on how to combine GeneratePress & Elementor, plus tips & tricks!
Are you tired of figuring everything out on your own? Take a short cut! You can get the exact same configuration you see here on freshvanroot.com on your own site. Check our WordPress Kick Start offering out!