


Building your own list of email subscribers is something you, as a website owner, should think about.
Your posts on social media reach only a fraction of your followers, and you should not rely on a 3rd party platform to build a community around your business or brand.
In short, launching a newsletter is a good idea. Give your visitors a chance to subscribe directly to your site. Building an email list is slow food compared to launching a social media account. Think of it this way: one email subscriber is worth 100 followers on social media.
Elementor and Mailchimp
Elementor is a popular page builder for WordPress (most popular?). Recently, Elementor announced they passed the 4 million active install mark.
Elementor is successful because it brings a powerful visual editor to WordPress that is still easy to use. If you edit a page with Elementor, what you edit is what your website visitor will see. You do no longer need to switch between backend and frontend.
Mailchimp is the most popular email service for sending newsletters. It got popular by a dead-simple editor and a freemium business model. 8000 users sign up for Mailchimp every day.
Elementor supports Mailchimp out of the box! No more need to install another 3rd party plugin in WordPress.
We use Elementor and Mailchimp here on this site, in this post I show you how to connect both tools.
Setting up Mailchimp
Sign up for a Mailchimp account if you haven’t done so already. With a free account, you can create one email list with up to 2000 contacts (enough to get you started).
The first thing you need to create is an “audience”.
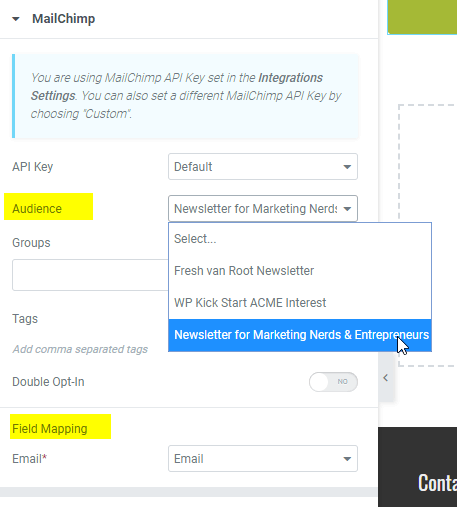
For our newsletter, the audience is called “Newsletter for Marketing Nerds & Entrepreneurs”. All people signing up via our website are added to this audience. Think of it as a list of contacts, or email list. The audience defines
- The name
- Default from eMail and name
- The company/organization behind the email list
- and more
You can edit these settings at a later time. The focus of your newsletter might change after a while.

For every audience, you can create signup forms, import contacts, and more.
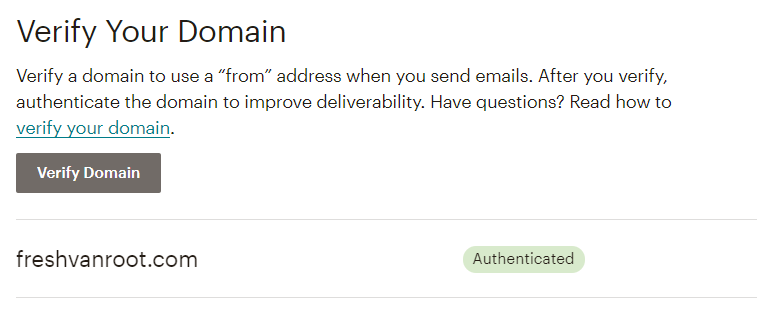
Be sure to connect and verify your domain. This step helps to improve the deliverability of your emails.
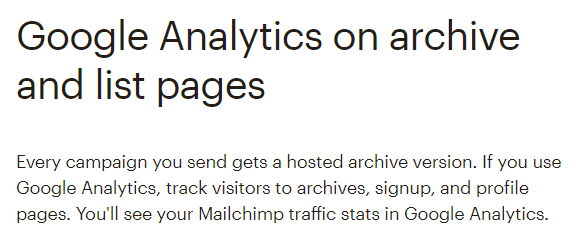
Also, you can connect your Google Analytics account to your Mailchimp account. This helps you to identify traffic coming from your newsletter on your GA account, and also allows you to track the traffic on your newsletter archive pages (web version of your newsletter) in GA.
Creating the API key in Mailchimp
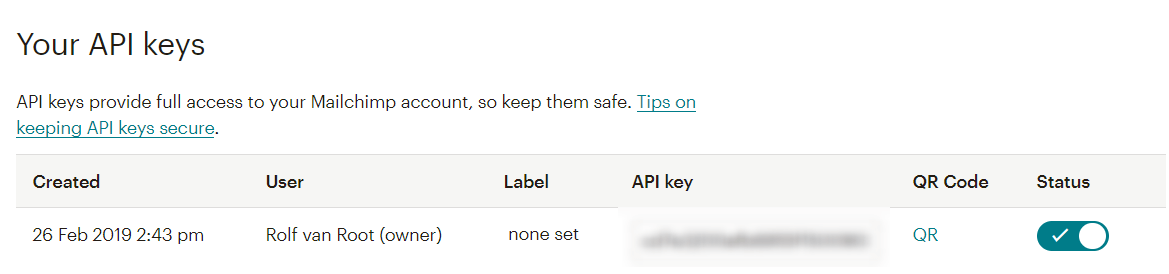
After you created an account and your audience, browse to account settings.
Click Extras > API keys. Create a Key. Be aware that anyone having this key can connect to your Mailchimp account!
Adding the API key in Elementor
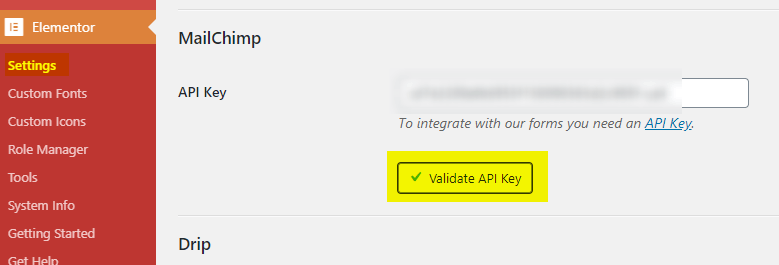
Login to your WordPress site and browse to Elementor settings. The integrations tab shows the Mailchimp API key field. Copy and paste your API key and save. Click Validate API key and watch out for the green checkmark.
Now Elementor is connected with your Mailchimp account.
Not using Elementor? Browse our tutorials.
Creating a Mailchimp sign up form in Elementor
In the next step, you create the signup form in Elementor. Mailchimp comes with pre-built sign up forms for your email list. You could embed the Mailchimp signup form via an HTML widget in Elementor.
Creating the signup form in Elementor gives you more options to influence the design of your sign up form.
You are looking for the general forms widget. Add it to your page and add the fields you require from new newsletter subscribers. I would suggest an email address only, but you could change it to your liking in Mailchimp.
Browse the “actions after submit” section and select Mailchimp.

After you added Mailchimp in Actions after Submit a separate options panel appears right below. This is where you select the audience you want your email sign up form to connect to.
Now your Elementor powered WordPress site is connected to your Mailchimp account.
You should also take a look at the additional options, where you can set custom messages that are displayed to users submitting the form.
Testing the Mailchimp set up
After you created and published the page with the signup form, you can test if everything works as expected. You should do this before adding the form on all your pages.
Here is what you should test:
- Signup for your newsletter and see if the email address shows up as subscribed in Mailchimp
- Do you get a confirmation message on your website and via email?
- What happens if you want to subscribe to the same address again?
- Test the signup form from your mobile
- Ask others to do the same
You want to be sure this works. It would be embarrassing to ask people to sign up and later realize that new subscribers went into Internet nirvana.
Are you using Gmail? If yes, you can sign up multiple times by adding a plus sign and some text, like rolfm+mailchimptest@gmail.com. The email will land in your rolfm@gmail.com inbox, but for Mailchimp, it is a new email address of course.
Adding the form across your site using Elementor
You can save the widget that holds the Mailchimp sign up form as global and add it anywhere on your site. If you have more then 5 pages this is not very practical.
A better way to handle this is by creating a global section that holds your newsletter sign up form. This gives you better control of the whole design, not only the form.

Learn more about the differences between global sections/templates and global widgets.
Creating a pop up with the Mailchimp signup form
Adding a signup form on the footer or sidebar is the passive way of building subscribers for your newsletter. If you wanna try out a more aggressive way to build subscribers you can take a look at the Elementor pop-up builder.
The Pop-Up builder in Elementor comes with lots of templates for newsletter signup forms. Browse the available options and start customizing.
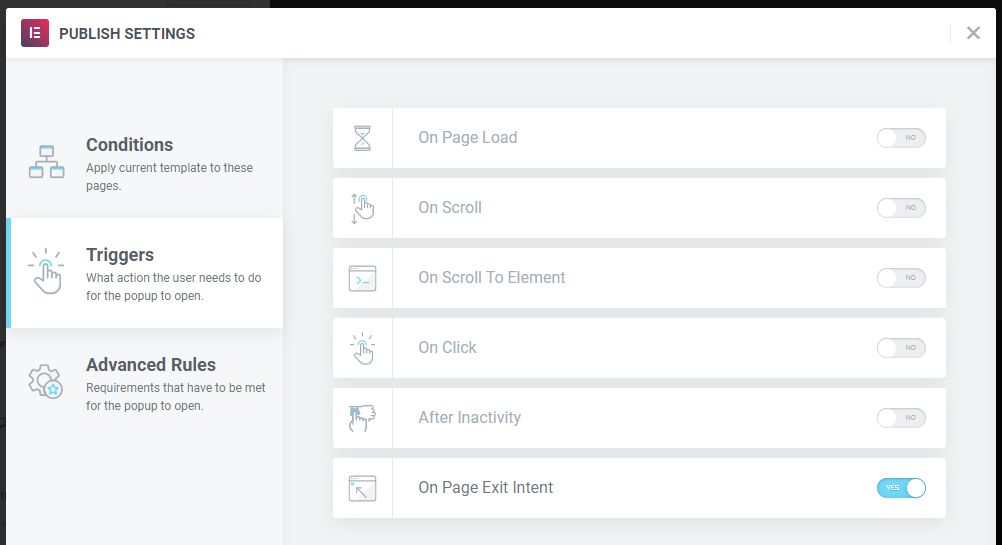
Spend your time finding the right triggers.
On freshvanroot.com, we constantly experiment with different pop-ups. At the moment we are running an exit-intent-popup. Every time the mouse cursor moves away to the browser menu it is triggered.

There are many different triggers and display conditions you can experiment with in Elementor Pro.
Learn how to build pop-ups that don’t annoy with Elementor Pro.
Double Opt-In or Single Opt-In?
Double Opt-In was the default option in Mailchimp for years, but that changed. Today new audiences in Mailchimp are Single-Opt-In by default. If you want to be sure an email address is real, you can manually change to Double-Opt-In, which requires one extra step from a potential subscriber.
Mailchimp offers two opt-in settings for your audience: single opt-in and double opt-in. Both processes collect email addresses easily and safely and help you grow your audience. Depending on your organization’s needs, you may want to try the double opt-in process, which includes an extra confirmation step that verifies each email address.
via
Send a welcome email to your new subscribers
New subscribers sign up and forget about it. Your last newsletter was just sent and the next one is scheduled in 6 weeks. Sending a welcome email is a nice way of introducing yourself and pointing your new subscribers to the last edition of your newsletter.
This is what our welcome email looks like at the moment:

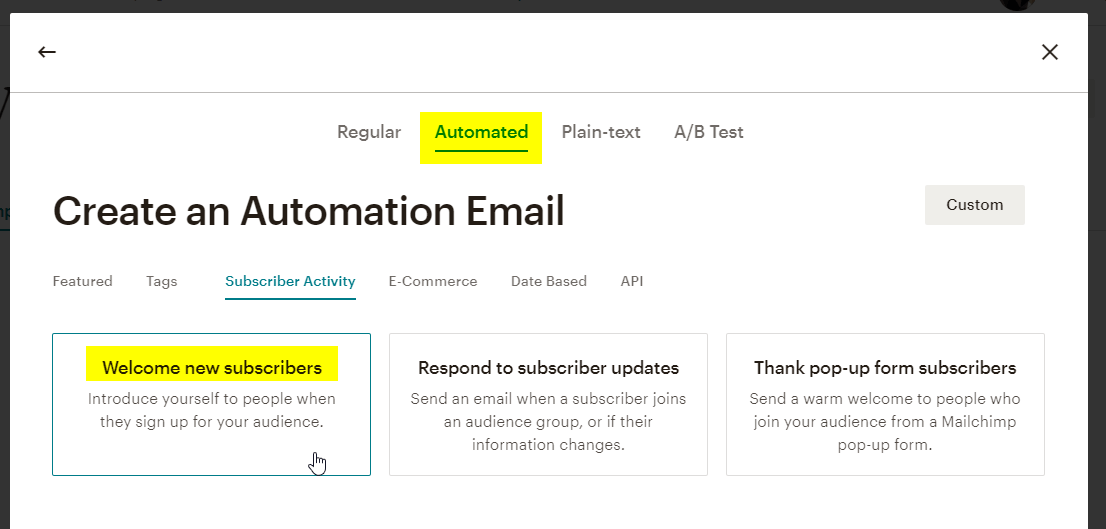
Mailchimp got you covered. If you want to set up your automated welcome email click Create > Email.
Select Automated and click “Welcome new subscribers”. Follow the process. It usually takes only a few minutes to have the first version of your welcome email ready.
Conclusion
Elementor and Mailchimp are both powerful tools that can be easily connected. From idea to deploying your signup form you only need an hour. Be sure to pay attention to how your visitors react to the newsletter signup form. You could also ask around for feedback. The hard part, of course, is to offer a newsletter that is worth subscribing to.
One Response