A few months back Google updated Google Slides with an important feature.
You can finally record presentations inside Google Slides without installing browser extensions or installing additional software.
The new recording feature added by Google comes with the following options:
- Record speaker video from webcam
- Change the positioning and size of the speaker video
- Record audio from microphone
- During recording, you can see speaker notes in a separate window
- Upload the recording directly to Google Drive
- Maximum record time: 30 minutes
- You can also record audio or video only
- It is available for Google GSuite users only (Google Workspace users)
- Videos are recorded in the .webm format
- Officially this feature only works in Google Chrome
Video version of this blog post:
How does it work?
Step 1: Create the slide deck
Log in to Google Slides and create the presentation, or pick an existing one.
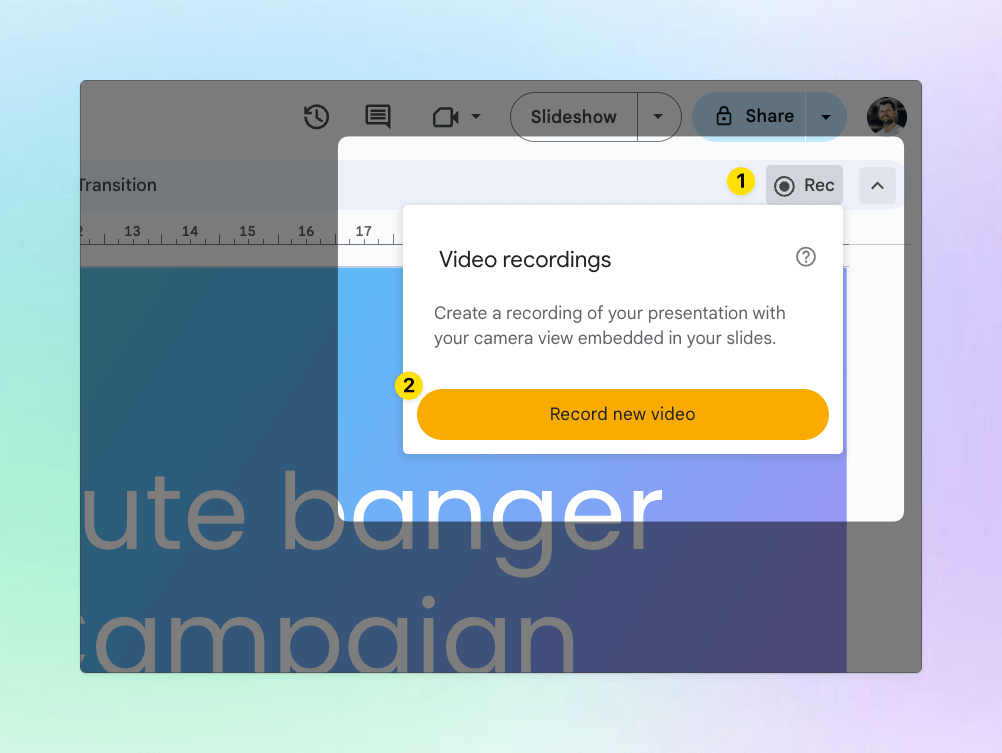
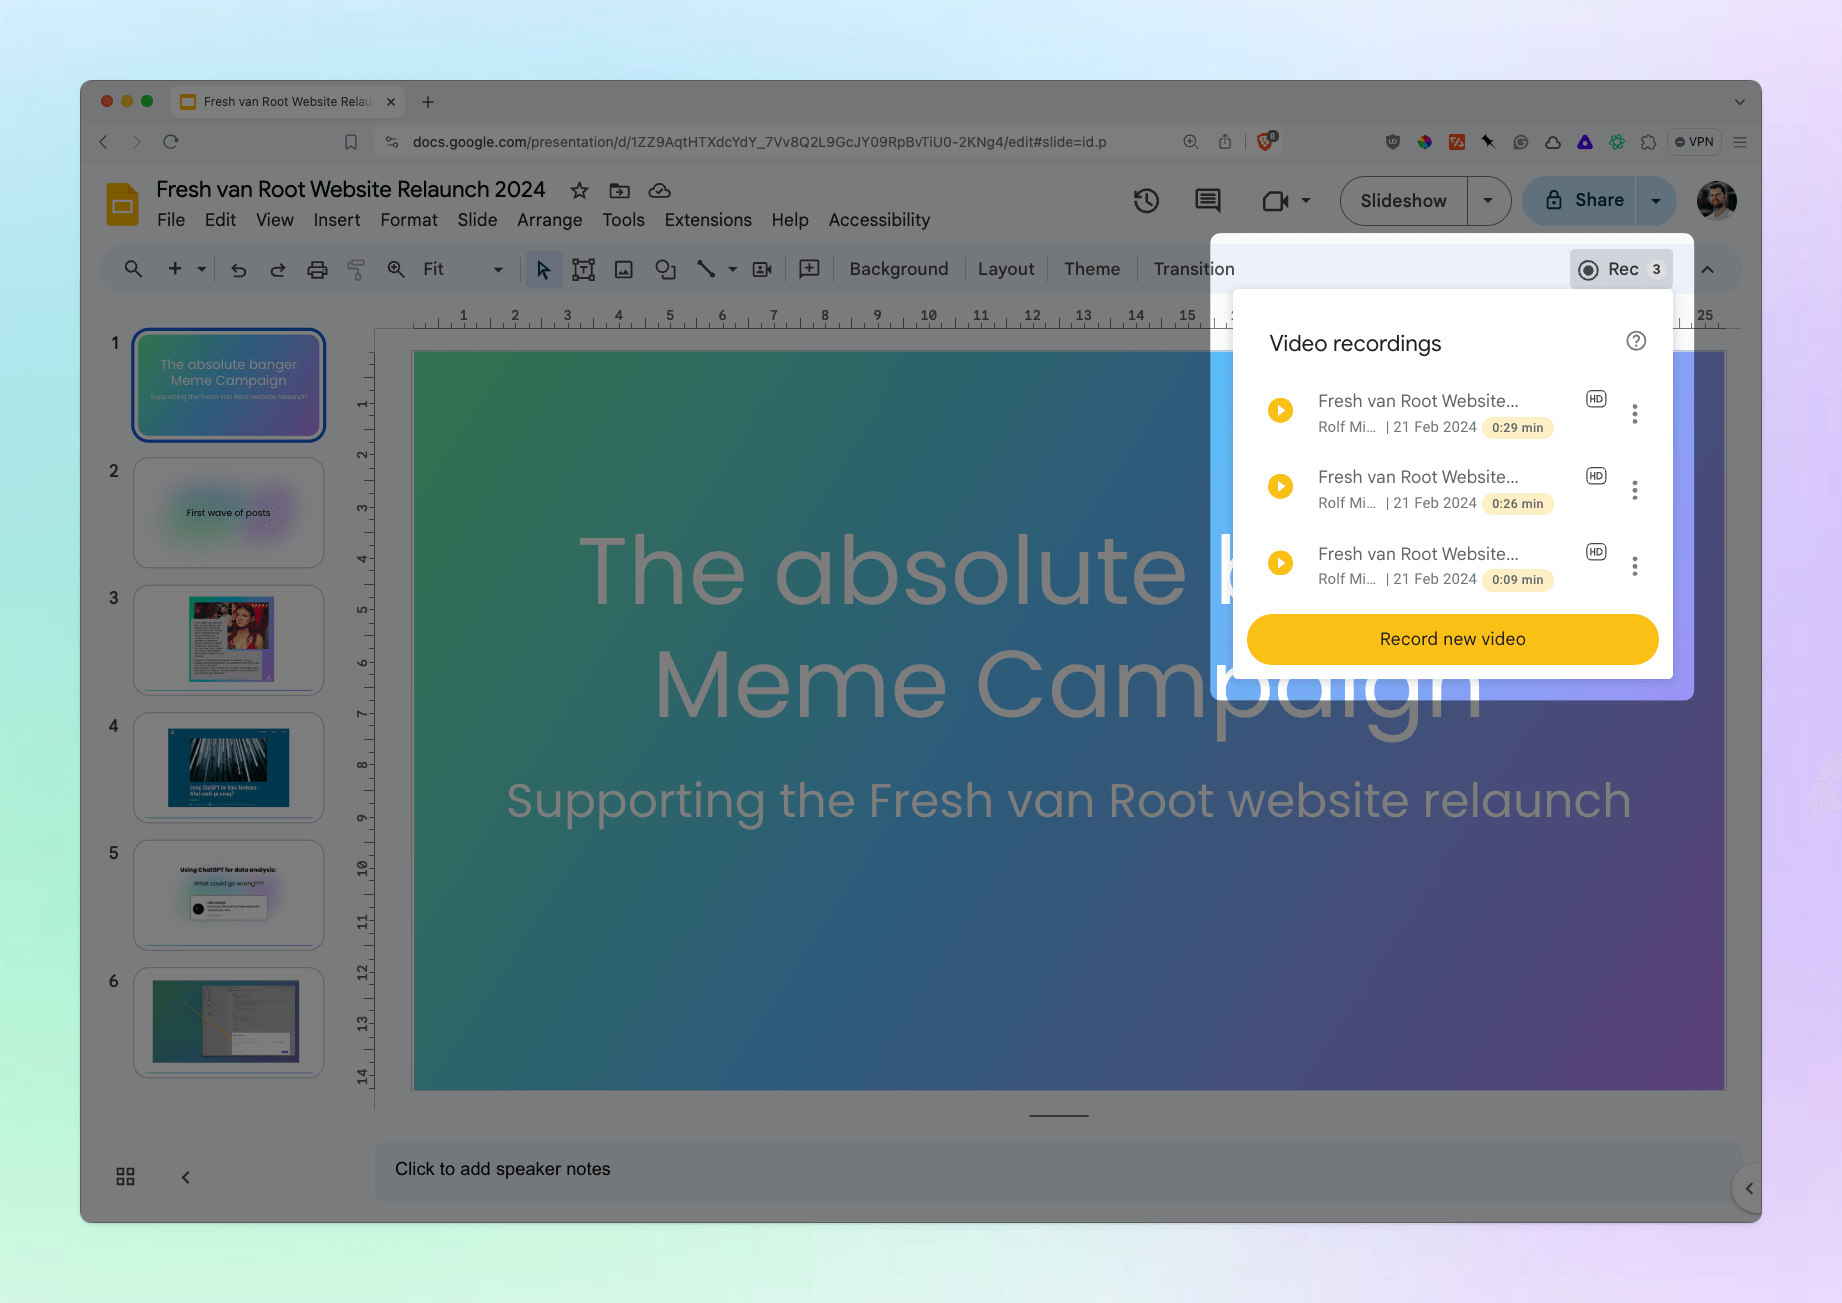
Step 2: Start the recording feature
In the top right corner, you will see a Recording (Rec) button.
Click the button and in the menu click the yellow “Record new video” button.
Step 3: Give browser permissions
If you launch the recording feature for the first time you will see a browser pop-up asking for permission to access camera and audio on your device.
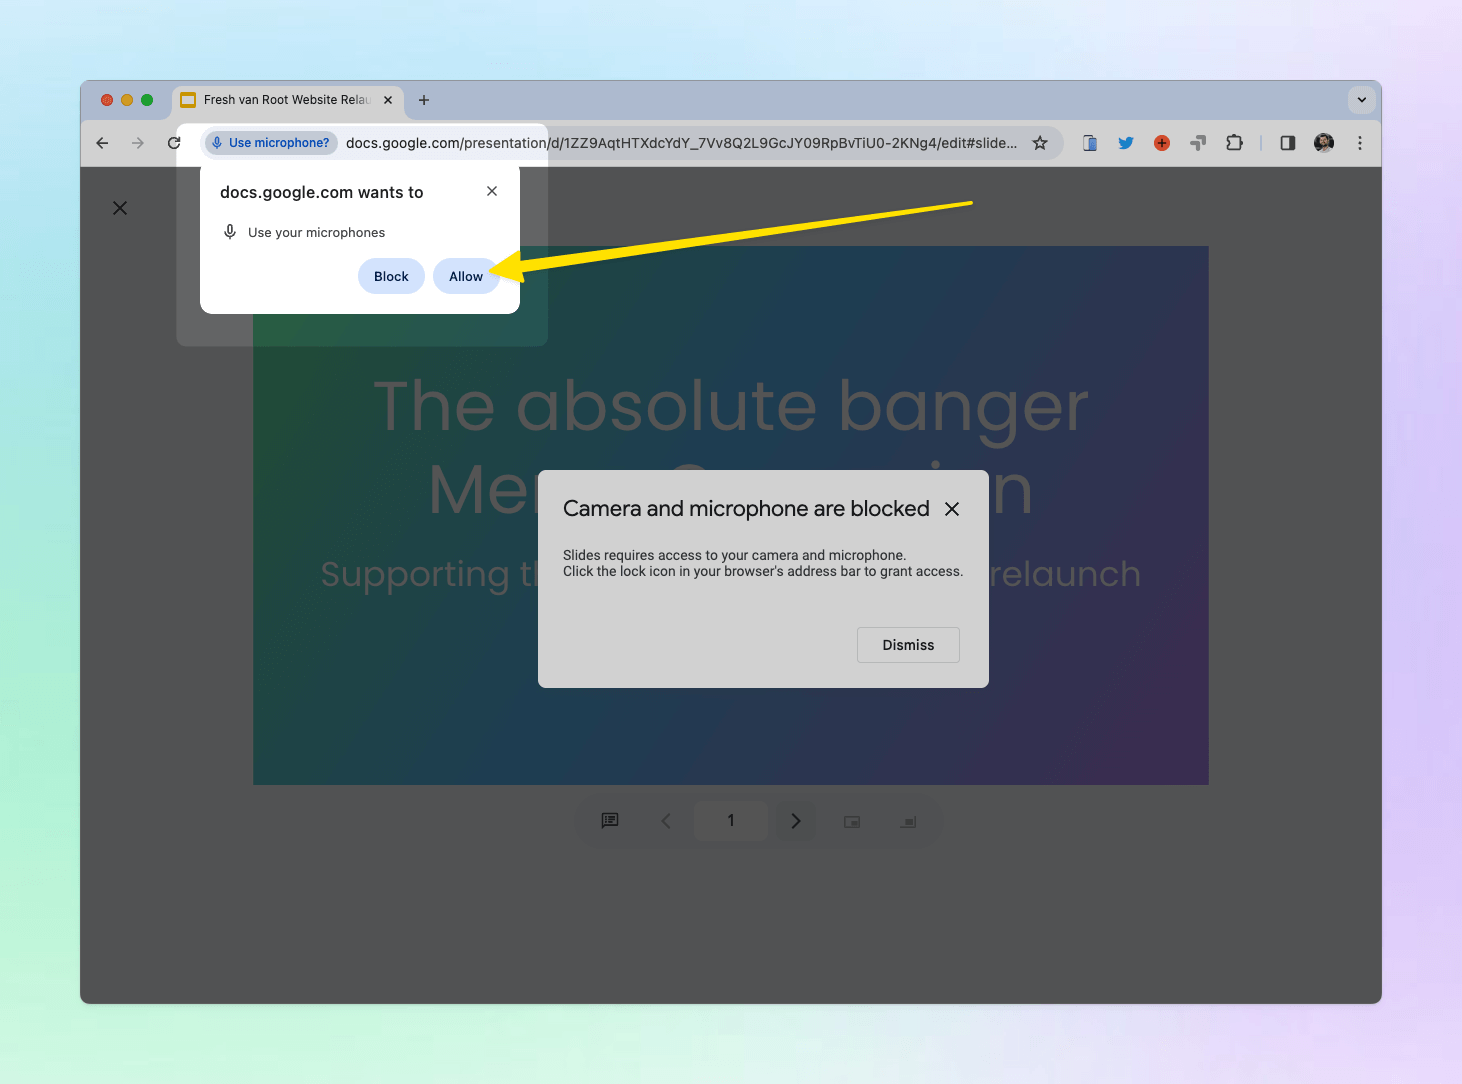
You can choose how long camera and mic access should be enabled for Google Slides.
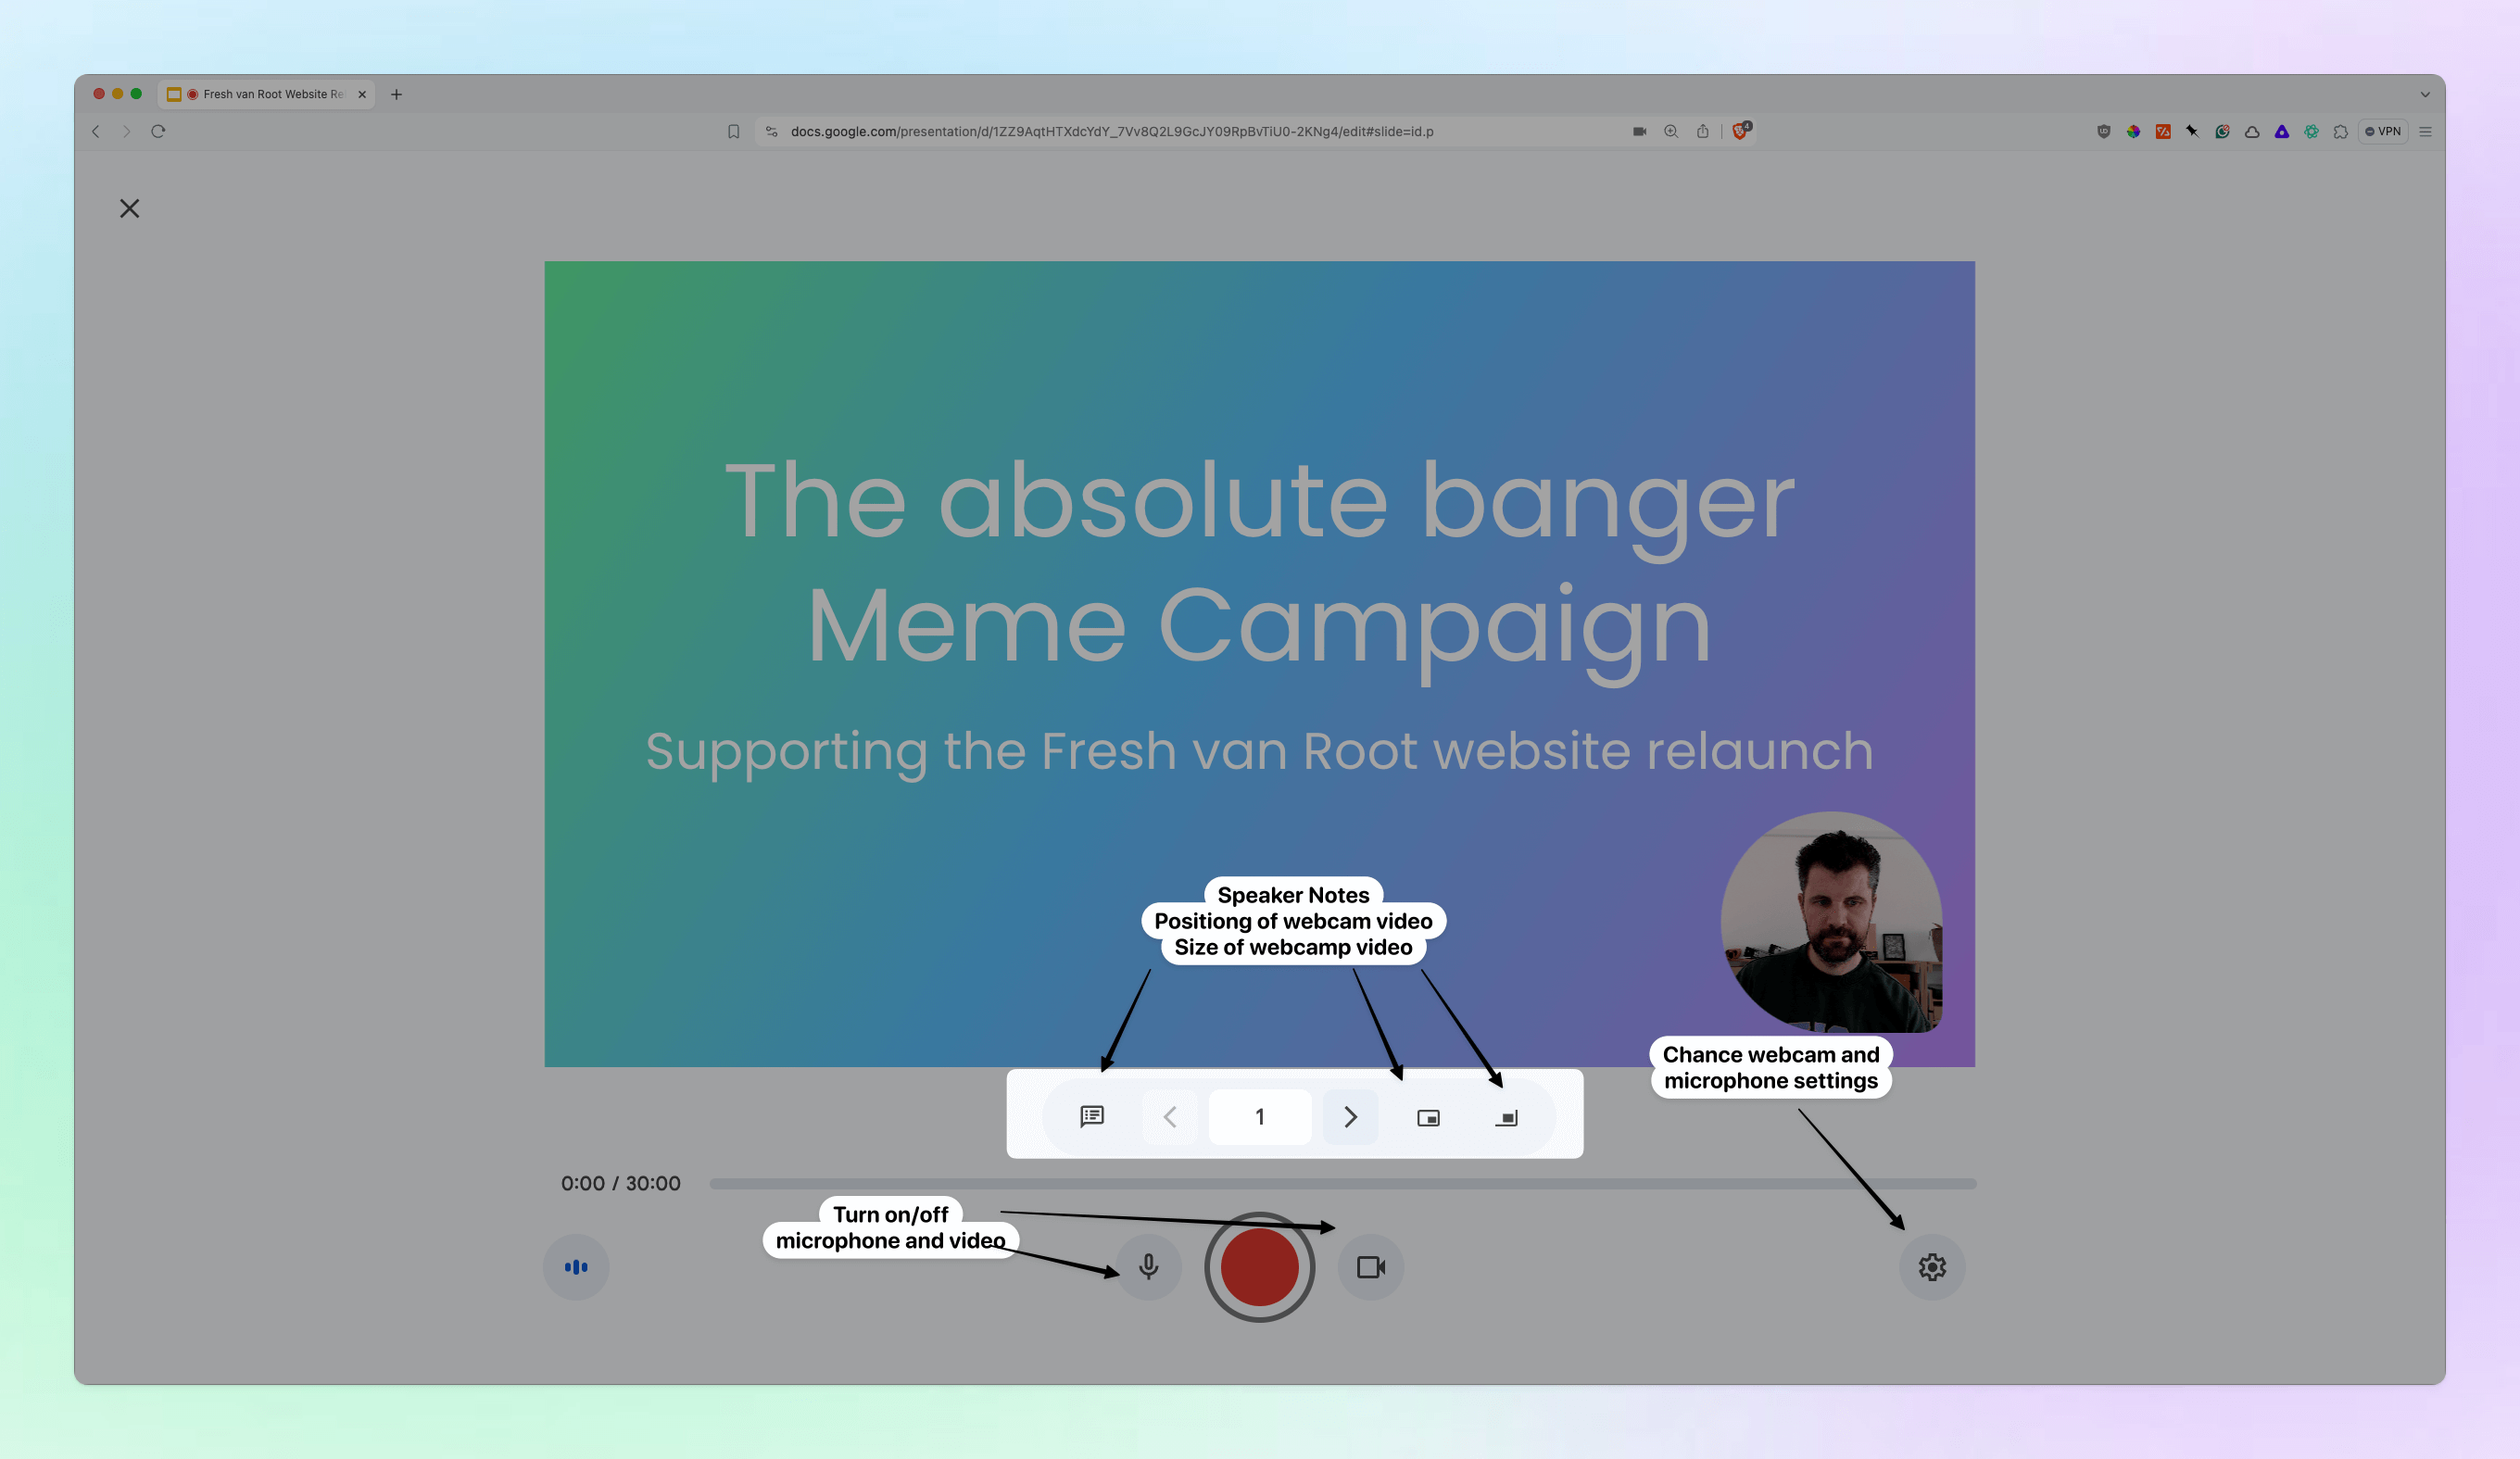
Step 4: Customize recording settings
Once permissions are given, you can start configuring your recording set up:
- If you record video, change the size and positioning of the speaker video
- Choose source for camera/microphone (for example, if you have multiple webcams or connected)
- Show speaker notes (opens in separate window)
- Enable/disable microphone or video recording
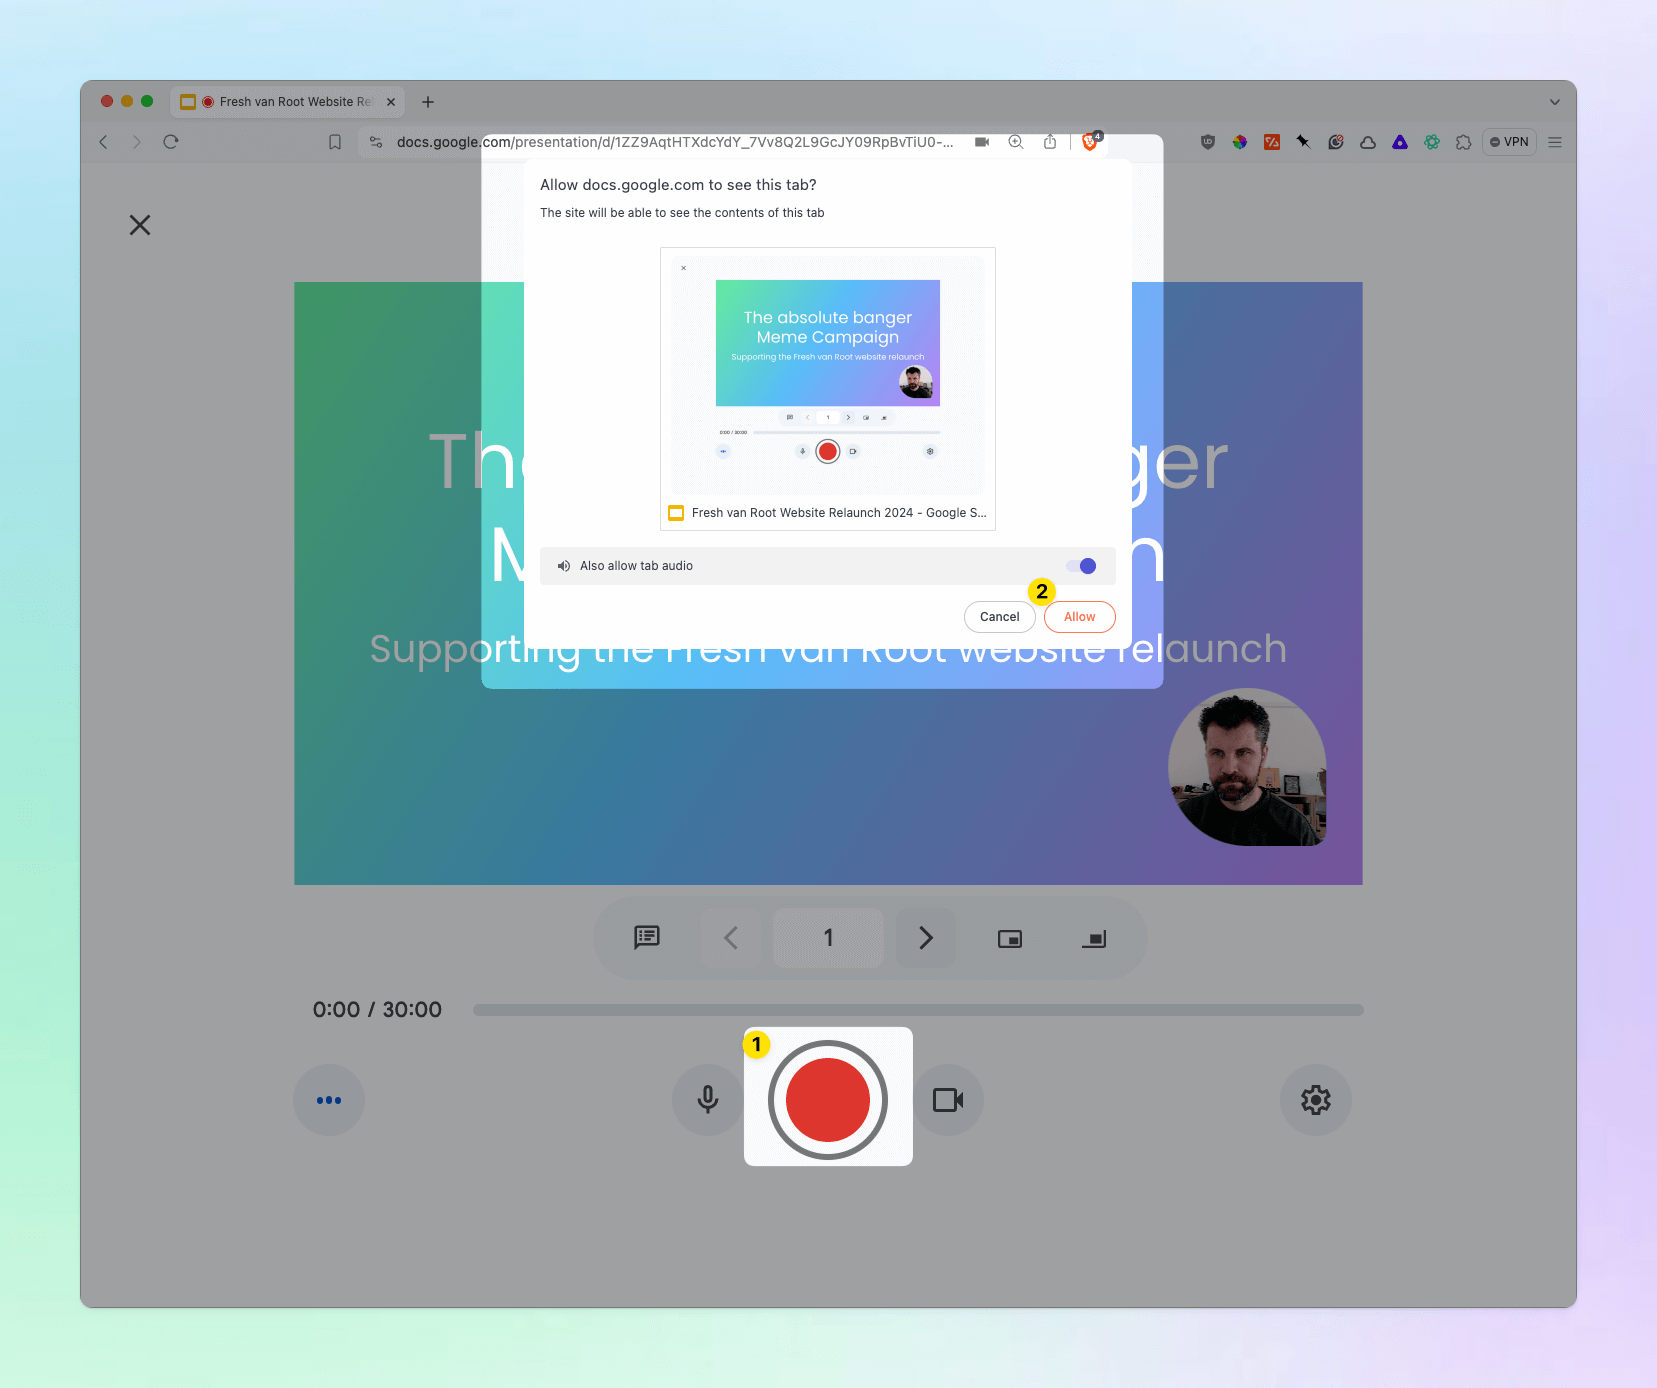
Step 5: Start recording
After clicking the red record button, you will see another pop-up asking for permission to record the browser tab.
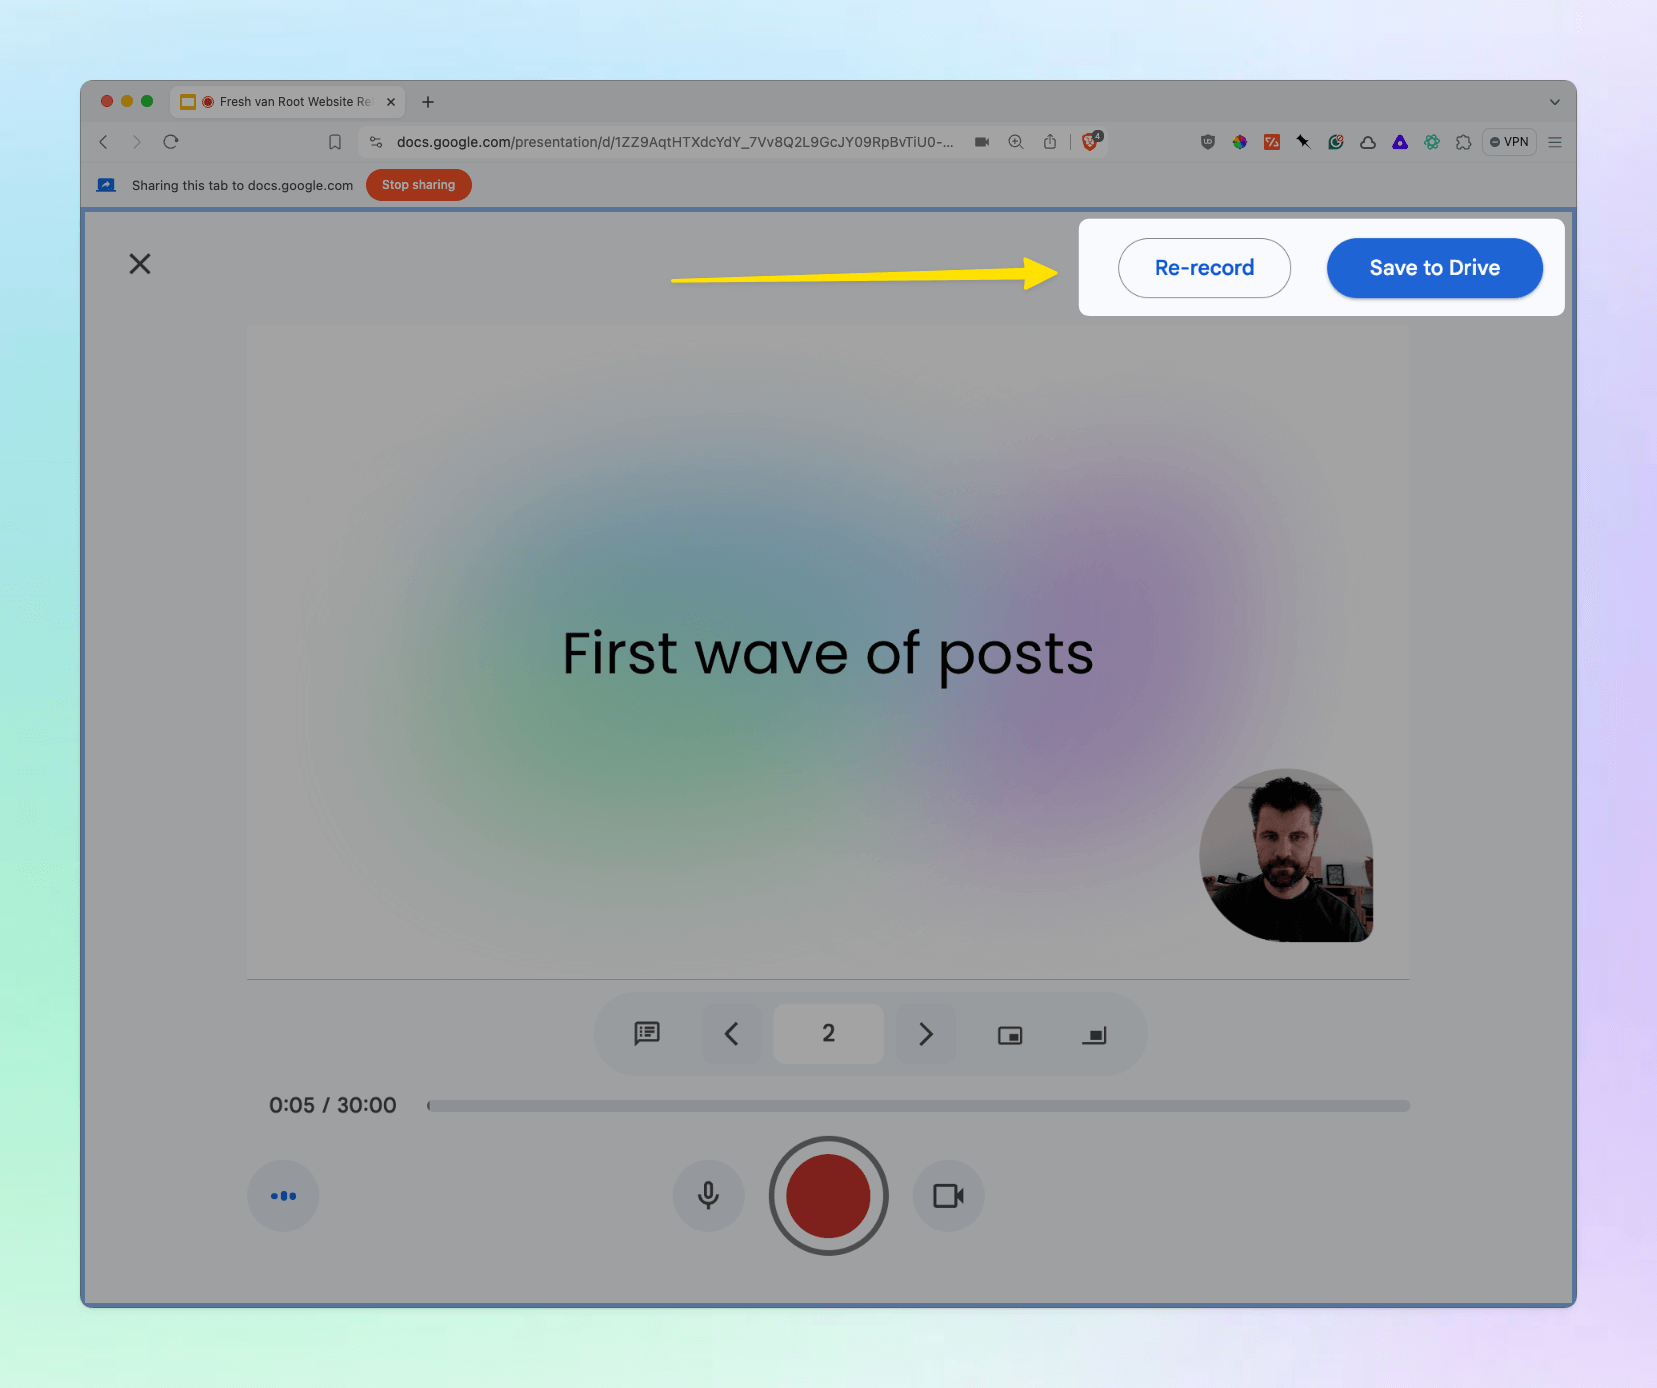
Step 6: Save or Re-Record
After you finished your recording and stopped it by clicking again the red button, you can choose to re-record or save the recording to Google Drive.
Your previous saved recordings are shown in the drop down you see after clicking the record button in the top right corner.
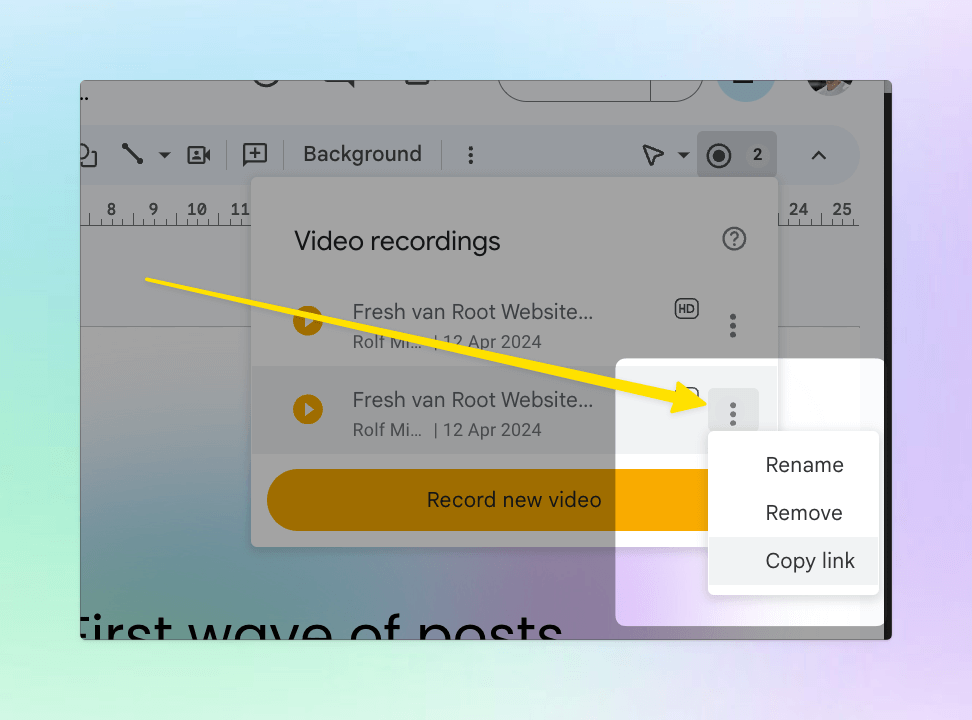
Step 7: Share the recording
For each recording stored on Google Drive, you can copy the link to and open it in a separate browser tab.
You can remove or rename specific recording attemps.
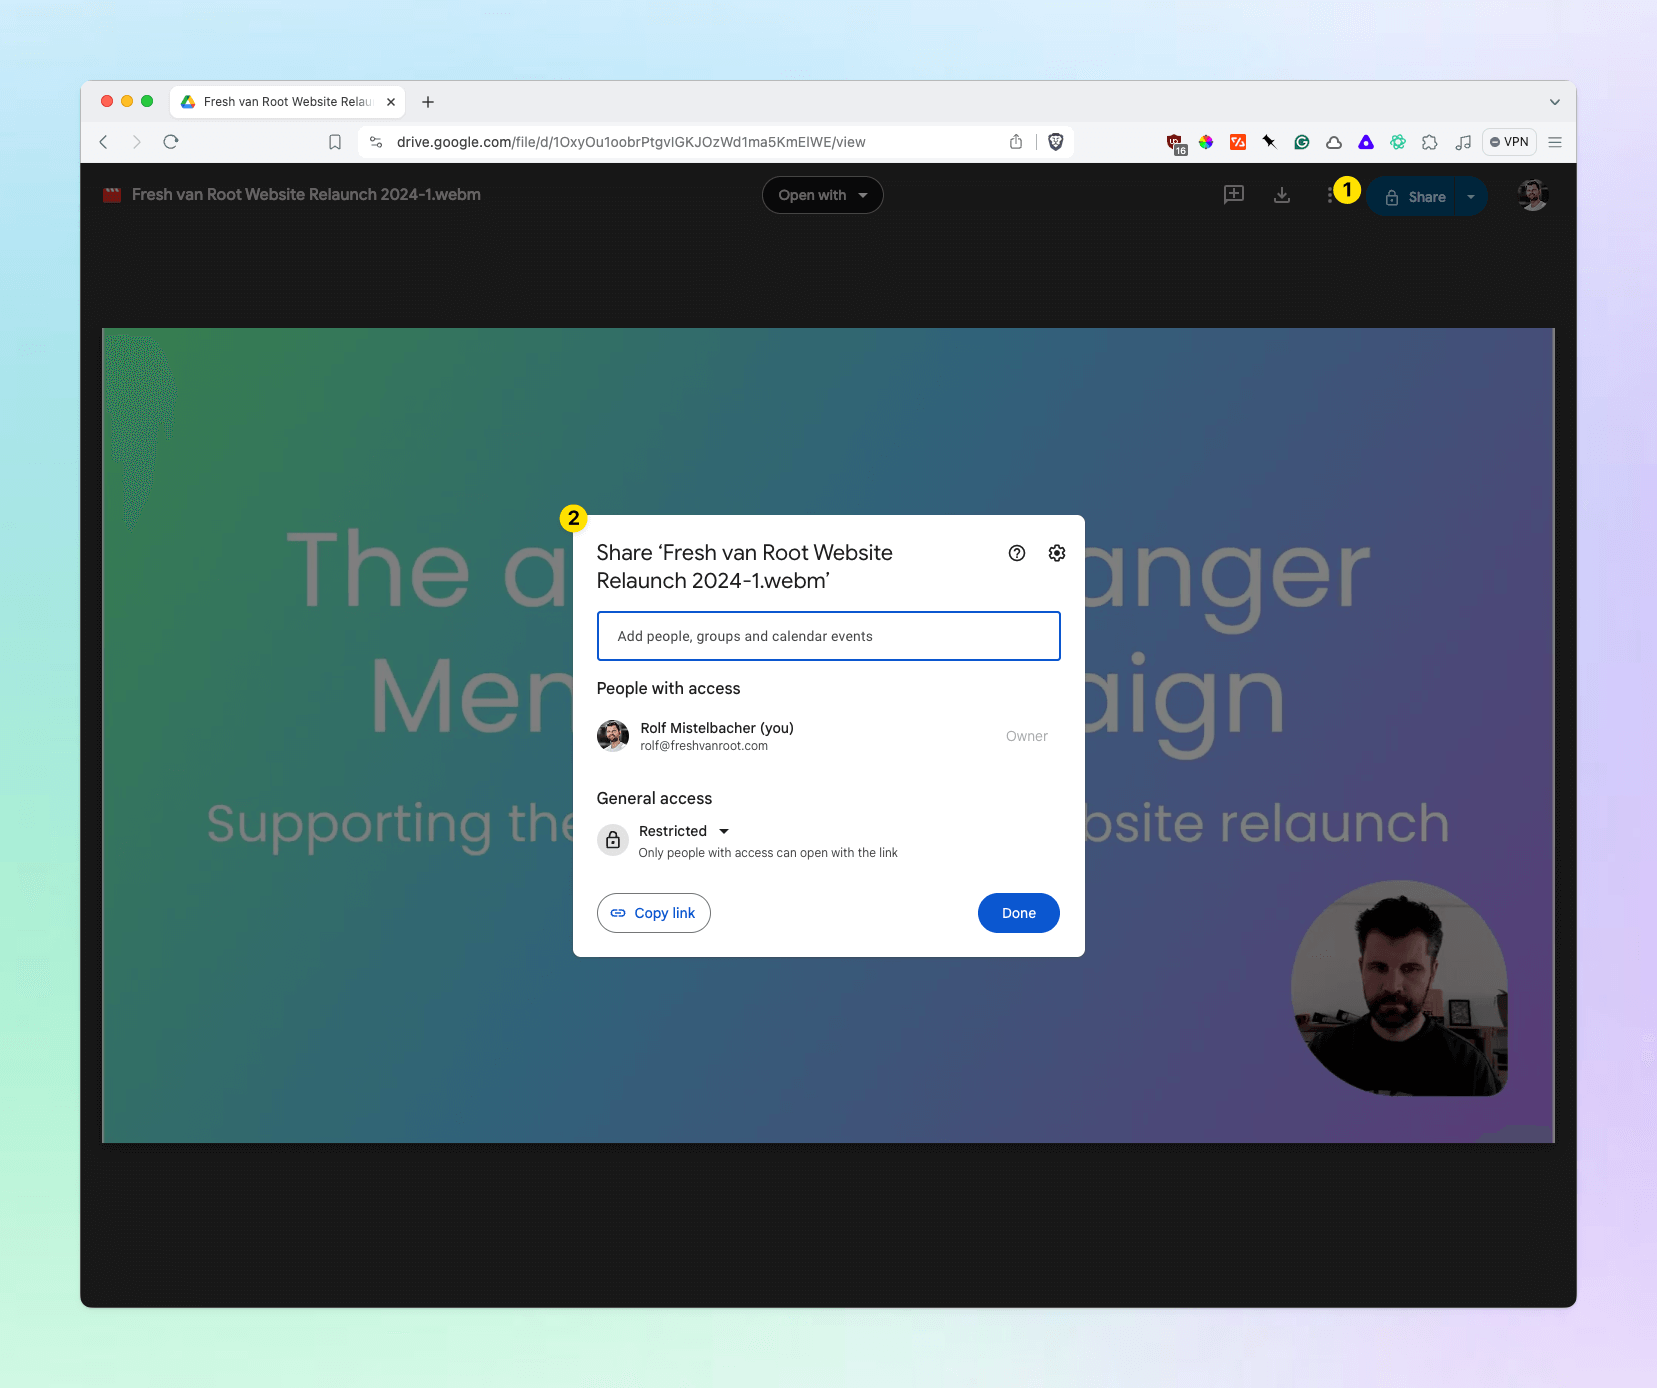
Before sharing the link on the web, be sure to change the permissions.
Optional: Editing the the video
Google Drive is not a video editor. If you want to edit the file in the browser, you can check out lots 3rd party Chrome extensions that connect to Google Drive. Screencastify is one of the products I have used in the past.
Alternatively, you can use any installed video editor software that can read the webm format. Camtasia is one of many products that you can use to edit video.
Conclusion
What took you so long Google? The feature is simple yet good enough for web video recording. Recording content for courses, lectures, a business pitch, … it gets easier using this. But most importantly, you do no longer need any 3rd party apps go get this done.