This topic is as old as the web: Images can add substantial load time to your site and can always be optimized for better performance.
I remember when I created my first website (a few under construction gifs, 2 pictures, and a link to a guestbook). I reached out for feedback and the first I got was: your website is way too big, a good start page has less than 100KB. Well, that was around 1997 and since then a few things changed.
We got more bandwidth, but even an average picture, taken on a smartphone, has a few megabytes now. An average stock photo has a few MBs too.
1996: Your start page should have below 100KB
2018: The average website size is 2MB
So the average website size today is 20 times the size compared to 1996.
Being below average is a good thing here. Still one of the biggest lever for reducing the load time of your site is optimizing the images (and it is way less technical than optimizing java scripts, caching and other tactics that should also be considered).
There are two ways to get your images below average:
- Resize the pictures to the minimum needed
- If a picture is only displayed as a teaser picture, say, for promoting a service in 300×300 pixel, why use a 2MB picture in a 2000×2000 resolution?
- Reduce quality in the images
- If a large picture is only added as a background in the header area of a blog header, why upload a picture in print quality?
So what tools can you use to quickly get better results?
TinyPNG & Kraken.io

TinyPNG offers a simple web interface to optimize a few images before publishing on the web. The web uploader only allows optimizing images below 5MB. That should not be a problem if you prepare your images for a blog or a landing page. A quick resize before uploading and you are good to go. Apart from its name, TinyPNG can also handle JPGs.
Kraken.IO also offers a free web interface – you can compare results and see what works best for you.
Both TinyPNG and Kraken offer WordPress plugins – if you are using WordPress you should check out their offering. These plugins optimize uploaded images in the background when uploaded to WordPress media library.
How can you compare picture quality side by side?
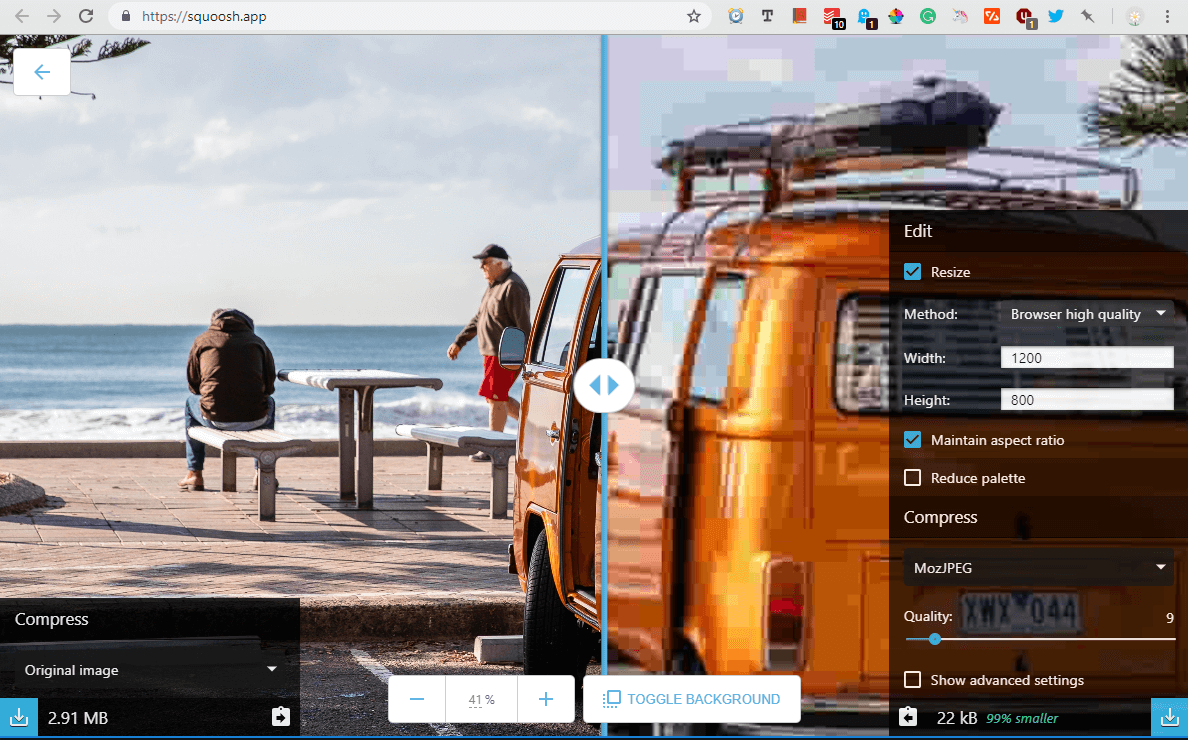
Google released a handy tool for that, called Squoosh. It allows to optimize quality and resize in one tool. Bonus: an immediate preview side by side. This is nice for optimizing one picture at a time and to manually tweak the level of compression.

Before & After
A short exercise: Pick a blog post or landing page of yours with a few images on it, run the pingdom pagespeed test and save the results. Then optimize the images on the page chosen, upload the optimized version of your images and run the test again. You should see better results.


