You use Obsidian already, so I do not have to tell you why it’s an excellent app for writing.
Now you might also want to use it for blogging with WordPress.
Here is an easy setup that works for me:
Video Version of this post:
Create a New WordPress User Account
Create a new WordPress user in your dashboard.
Why? The account name and details will be added in Obsidian to connect to your WordPress site. For nothing else.
Add this user with the role “Author”
Choose a username and a password.
Remember it 🙂
You can also use your existing user account, but I recommend creating a new one for that specific use case. You can change the user of the post before clicking publish in WordPress.
Install and configure an authentication plugin
Note: This step is necessary because, typically, a WordPress site does not allow connections from outside (anymore) by default. But you can try first if that also applies to your site – go to the next step and install the WordPress plugin in Obsidian and see if you can connect. But again, I would, in any case, suggest doing it with a separate user.
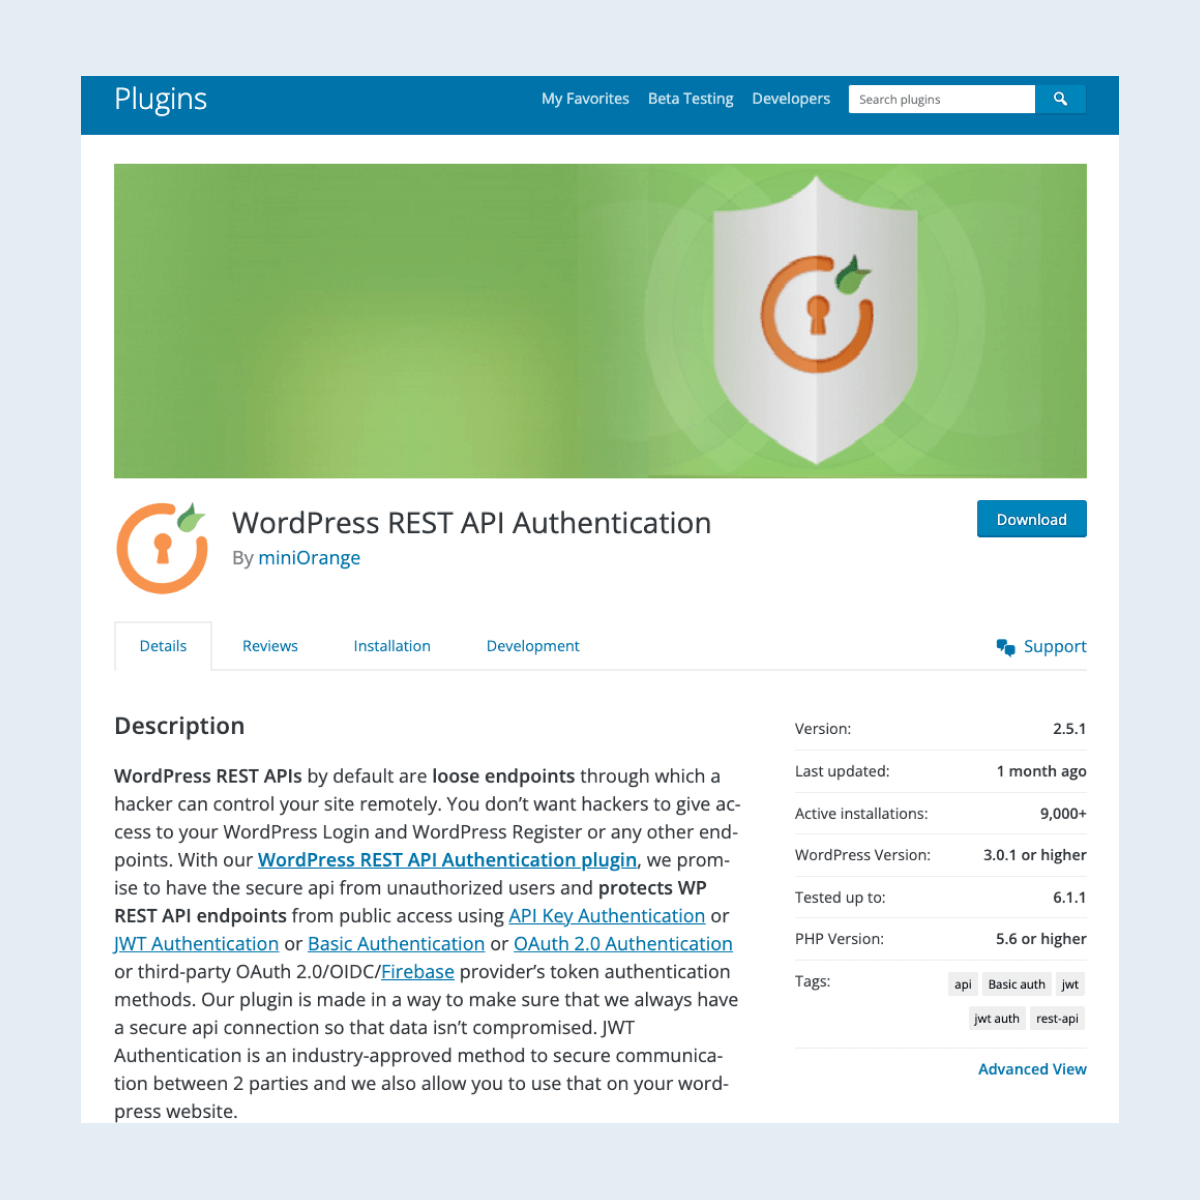
Install the WordPress REST API Authentication.
You need this plugin to make your WordPress site ready to accept connections from other apps, like Obsidian.
Install and activate the plugin.
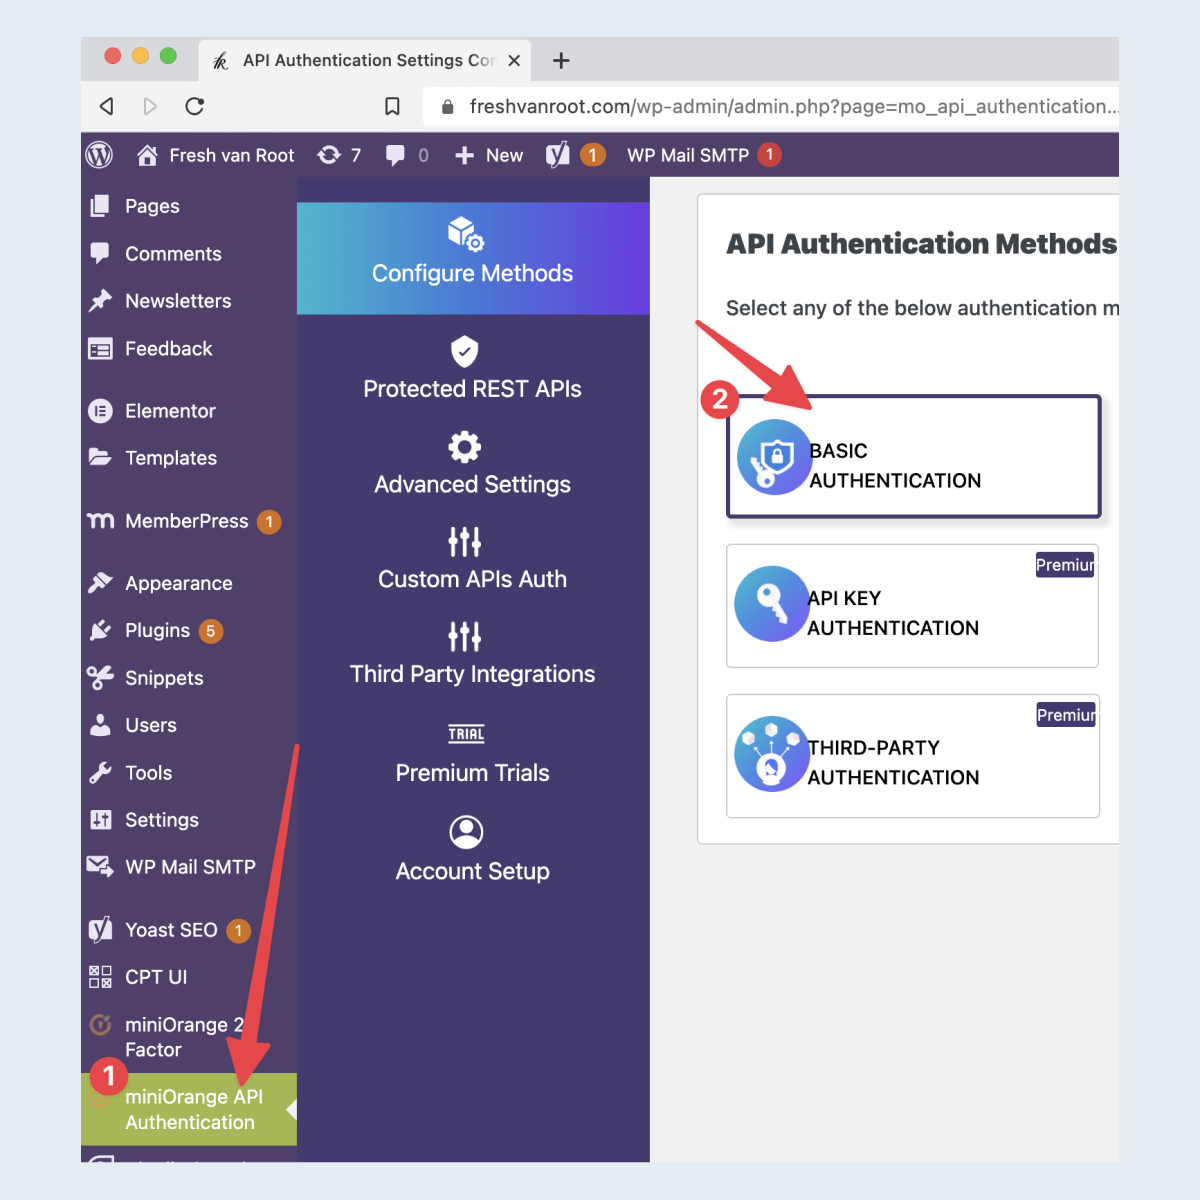
Now configure the basic authentication method.
Follow the steps in the screenshots:
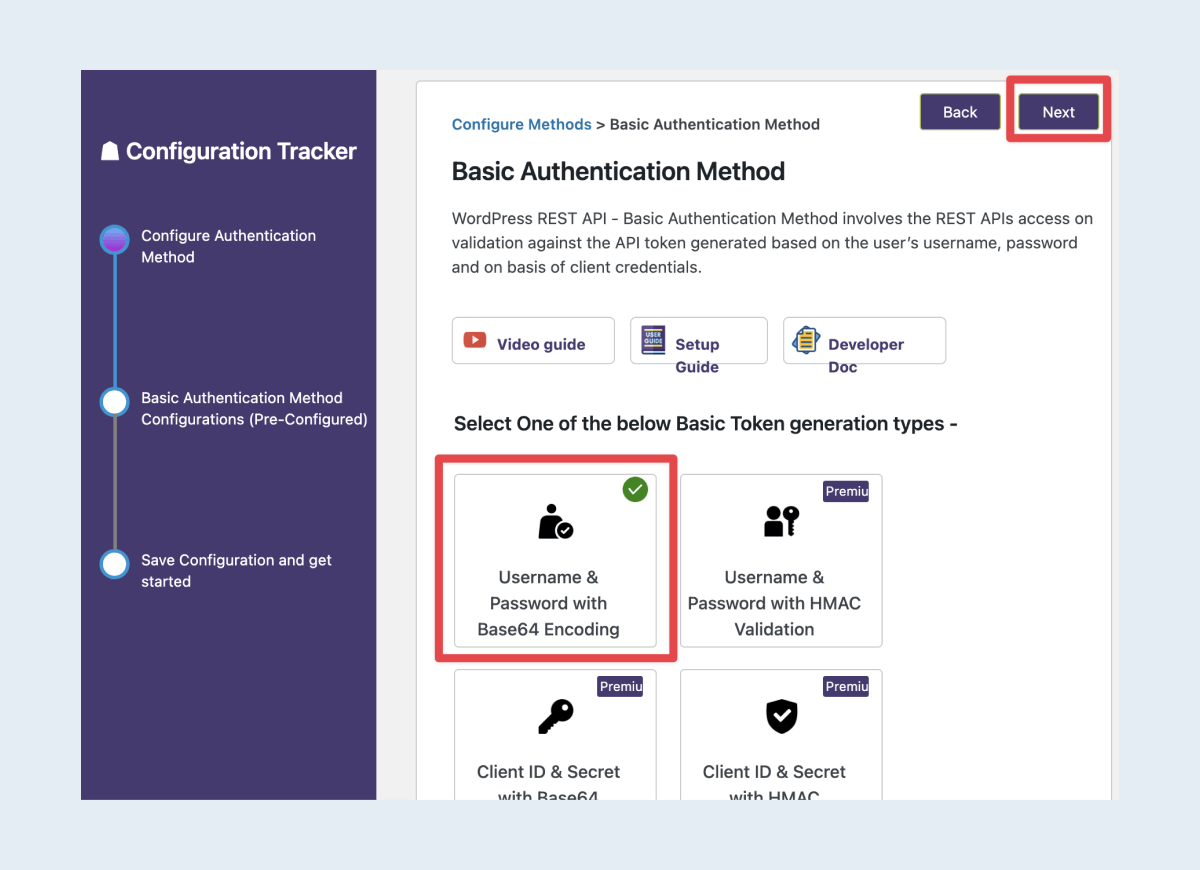
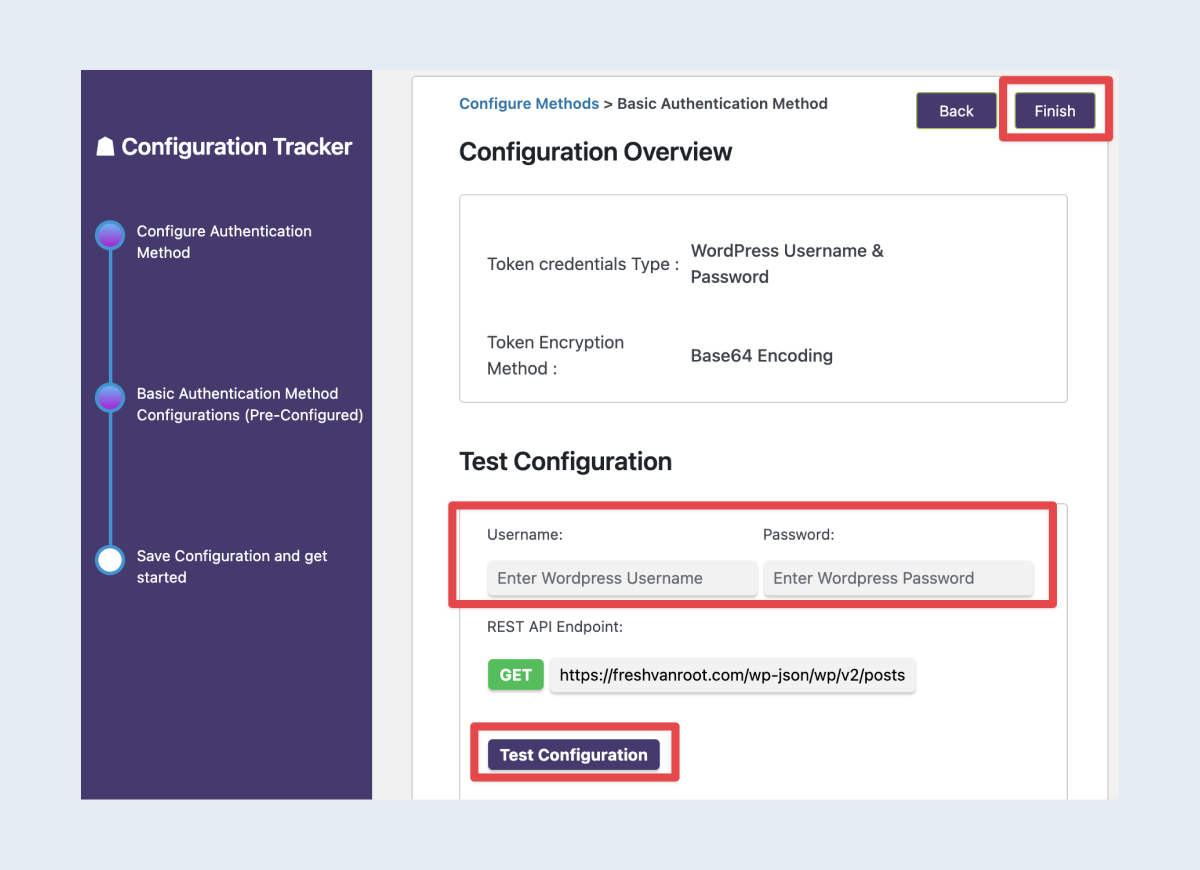

Now your WordPress site is configured for connections via external apps like Obsidian.
In Obsidian: Install the WordPress Plugin
Obsidian does not support publishing to WordPress out of the box. But thanks to a community plugin, you can add that functionality.
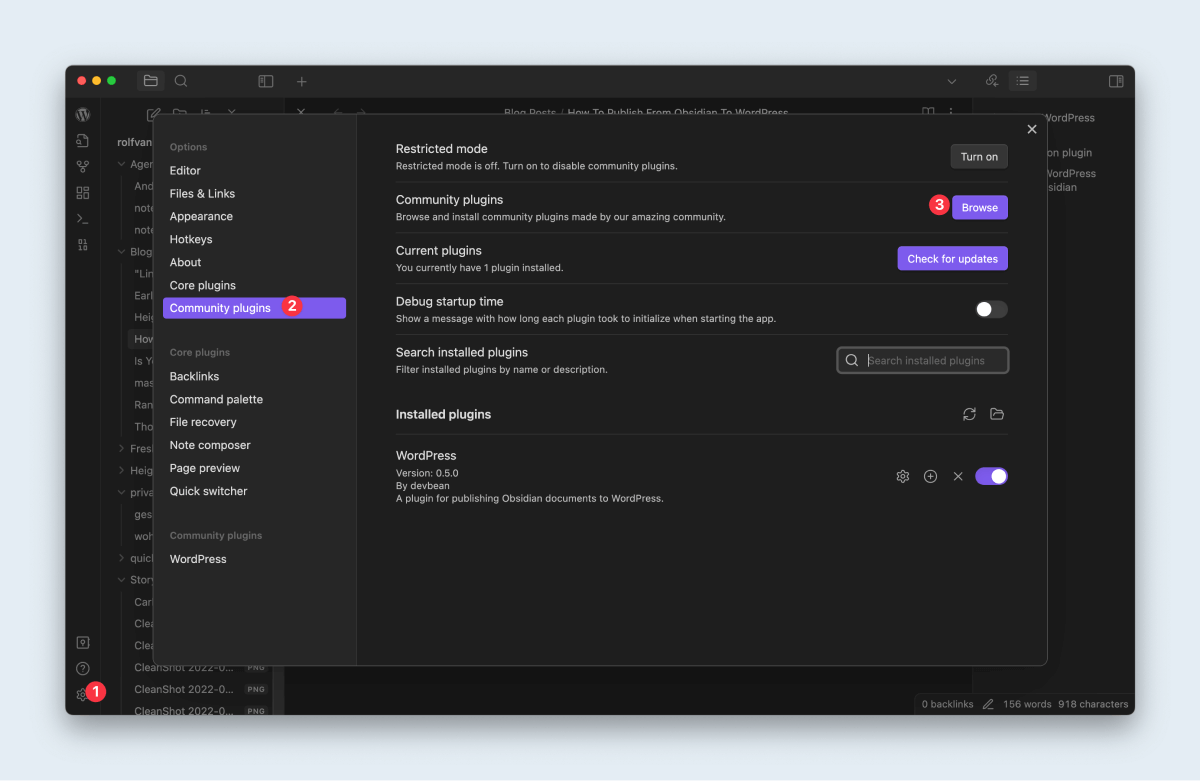
Then search for WordPress and install the “WordPress Publish” plugin.
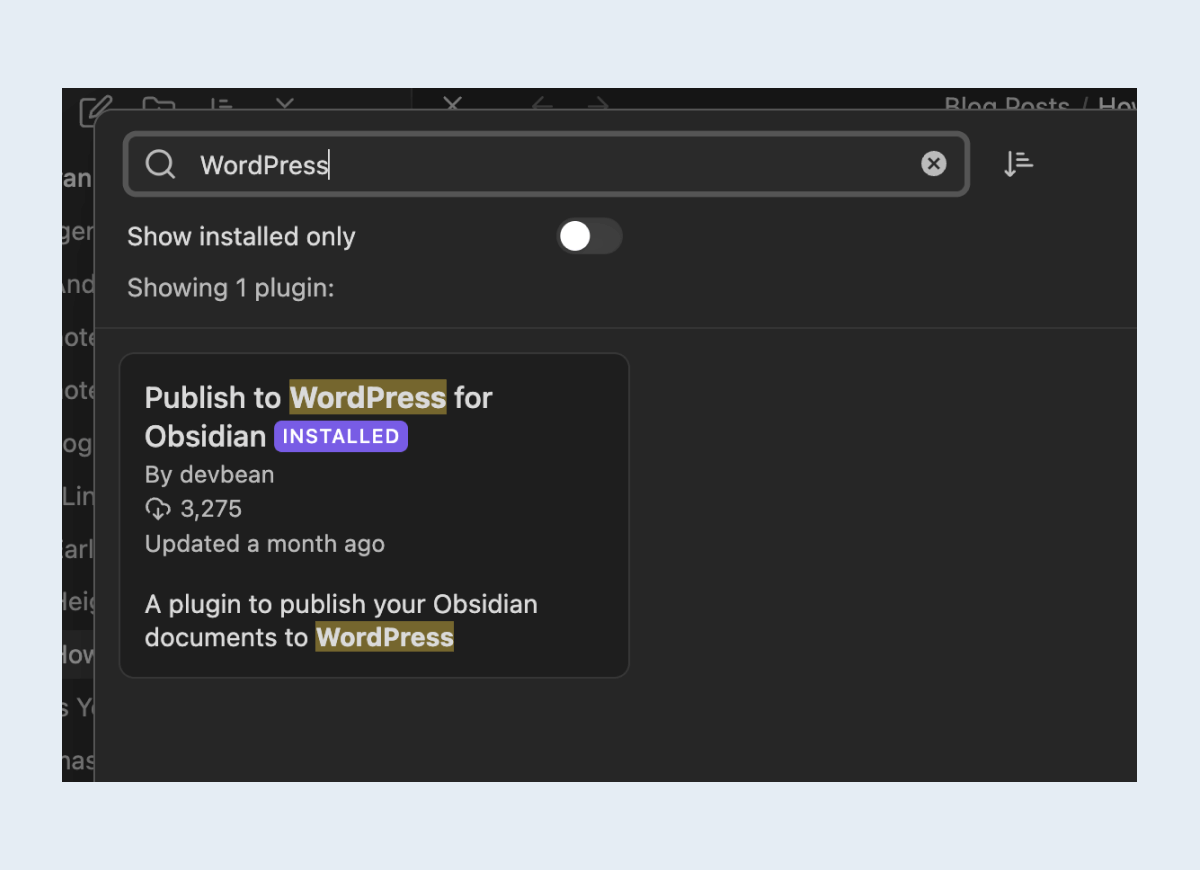
After the install finished, click Enable.
- Technical information about the plugin on GitHub
Configure WordPress Publish Plugin
Now, with the WordPress Publish plugin installed and enabled, you have to add the details of your WordPress site.
Again, in Obsidian settings, click the WordPress icon.
On this screen, you add the URL of your website, choose REST API in the dropdown, and I recommend to show the icon of the plugin in the sidebar.
After that is done, the icon should show up in the top left corner.
If not, close and restart Obsidian.
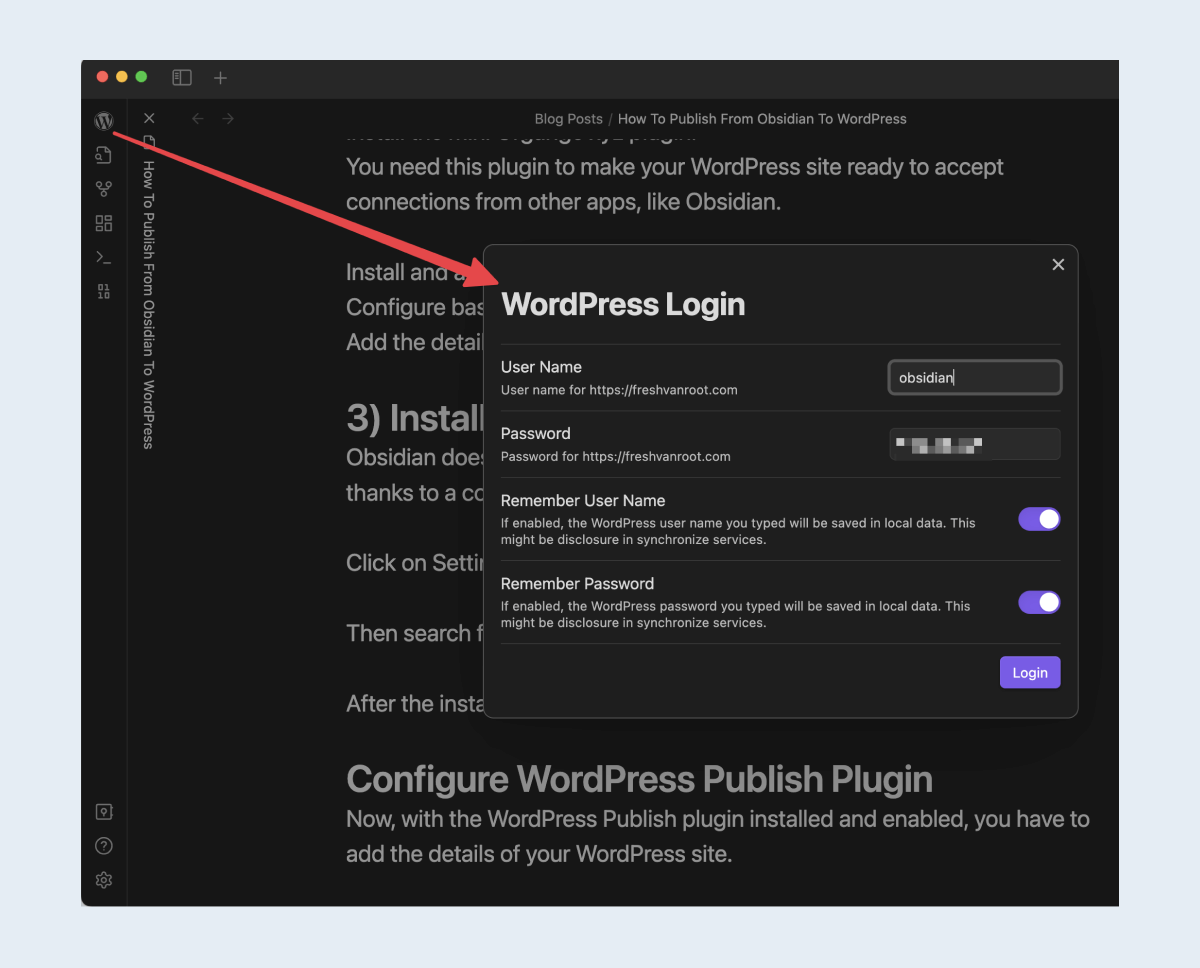
Click Login.
Now you can add the newly created account details in the following screen.
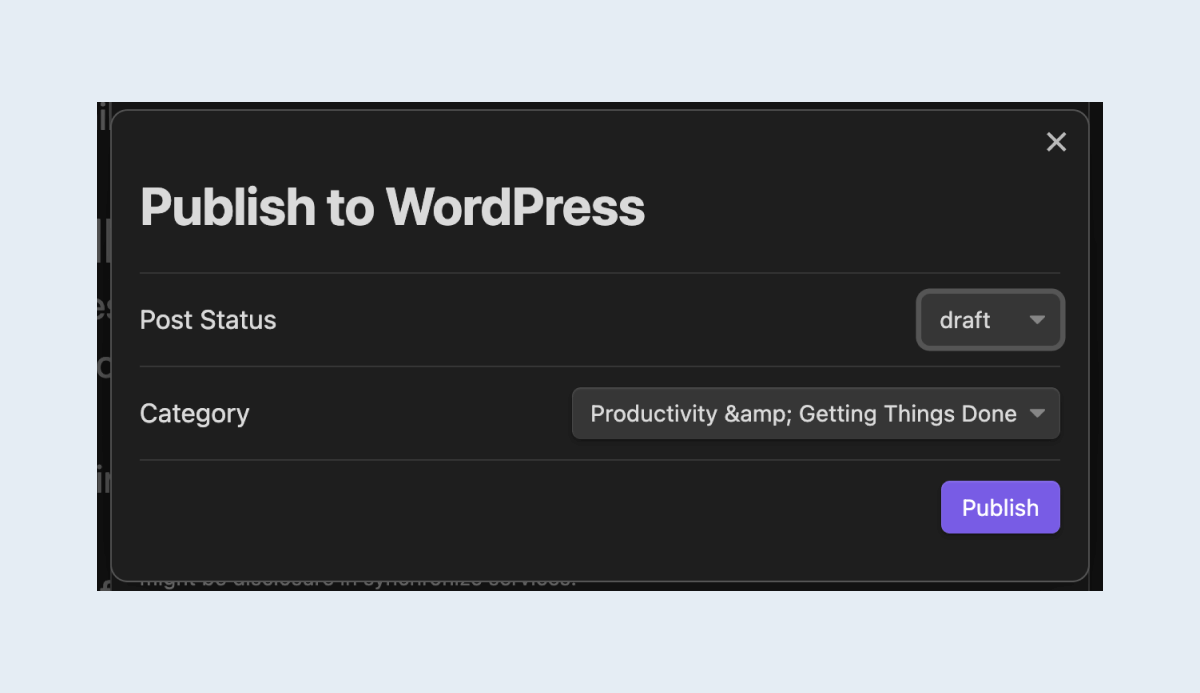
Add the user name, password, and I recommend publishing only the draft to WordPress.
Continue editing in WordPress
After you published a note from Obsidian to WordPress, you can continue editing there.
Here is one important thing to note: This p lugin creates “Classic” editor component in your post. You might want to convert it to “blocks” editing.
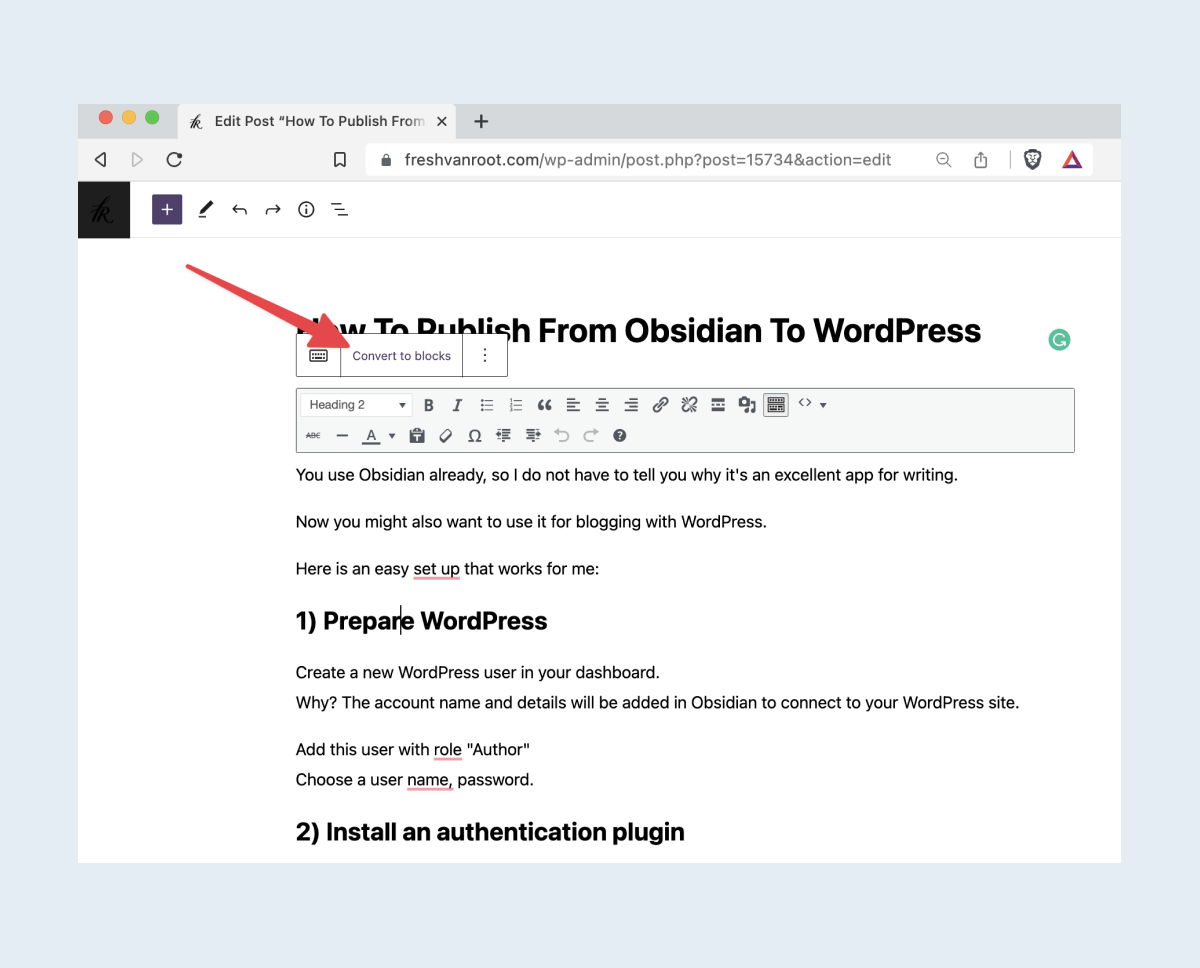
Apart from that, you want to change the author, add tags, categories, the permalink, a featured image, and much more – those are all things you can’t do inside Obsidian.
Hit publish
That’s it! You successfully drafted a blog post in Obsidian, published it to WordPress.
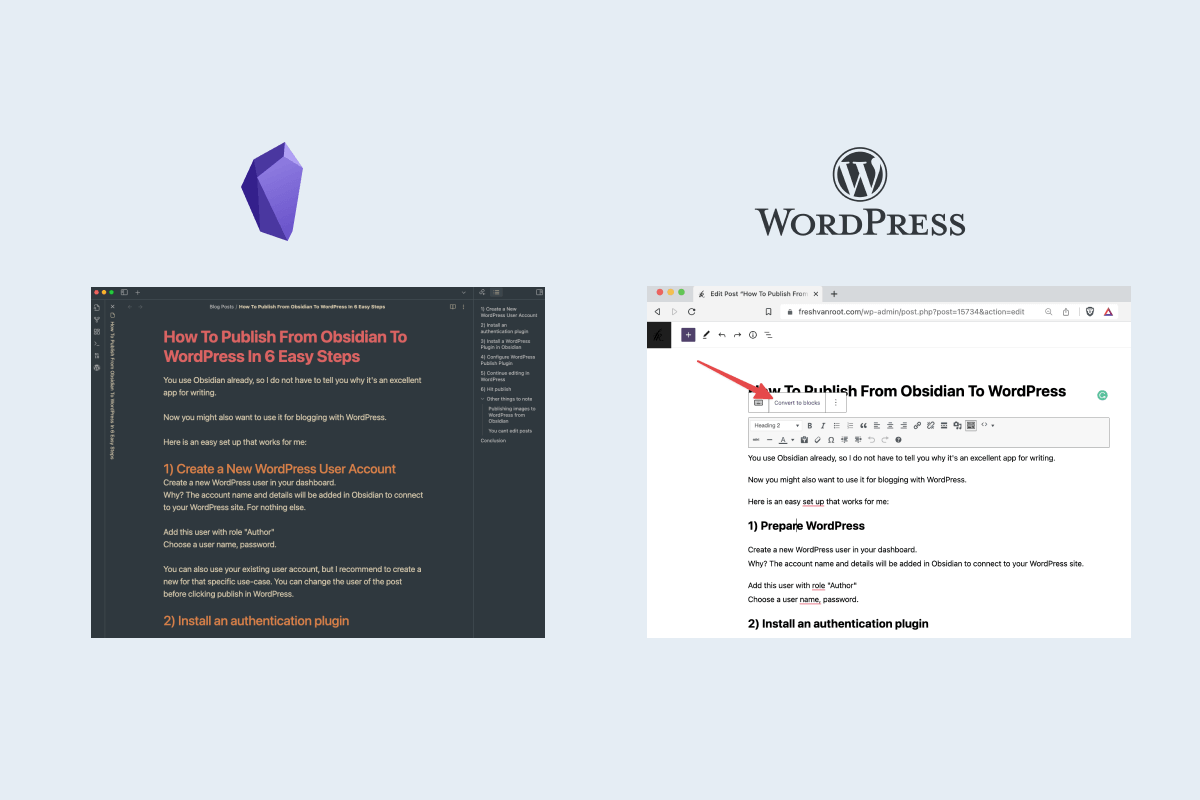
Other things to note
Publishing images to WordPress from Obsidian
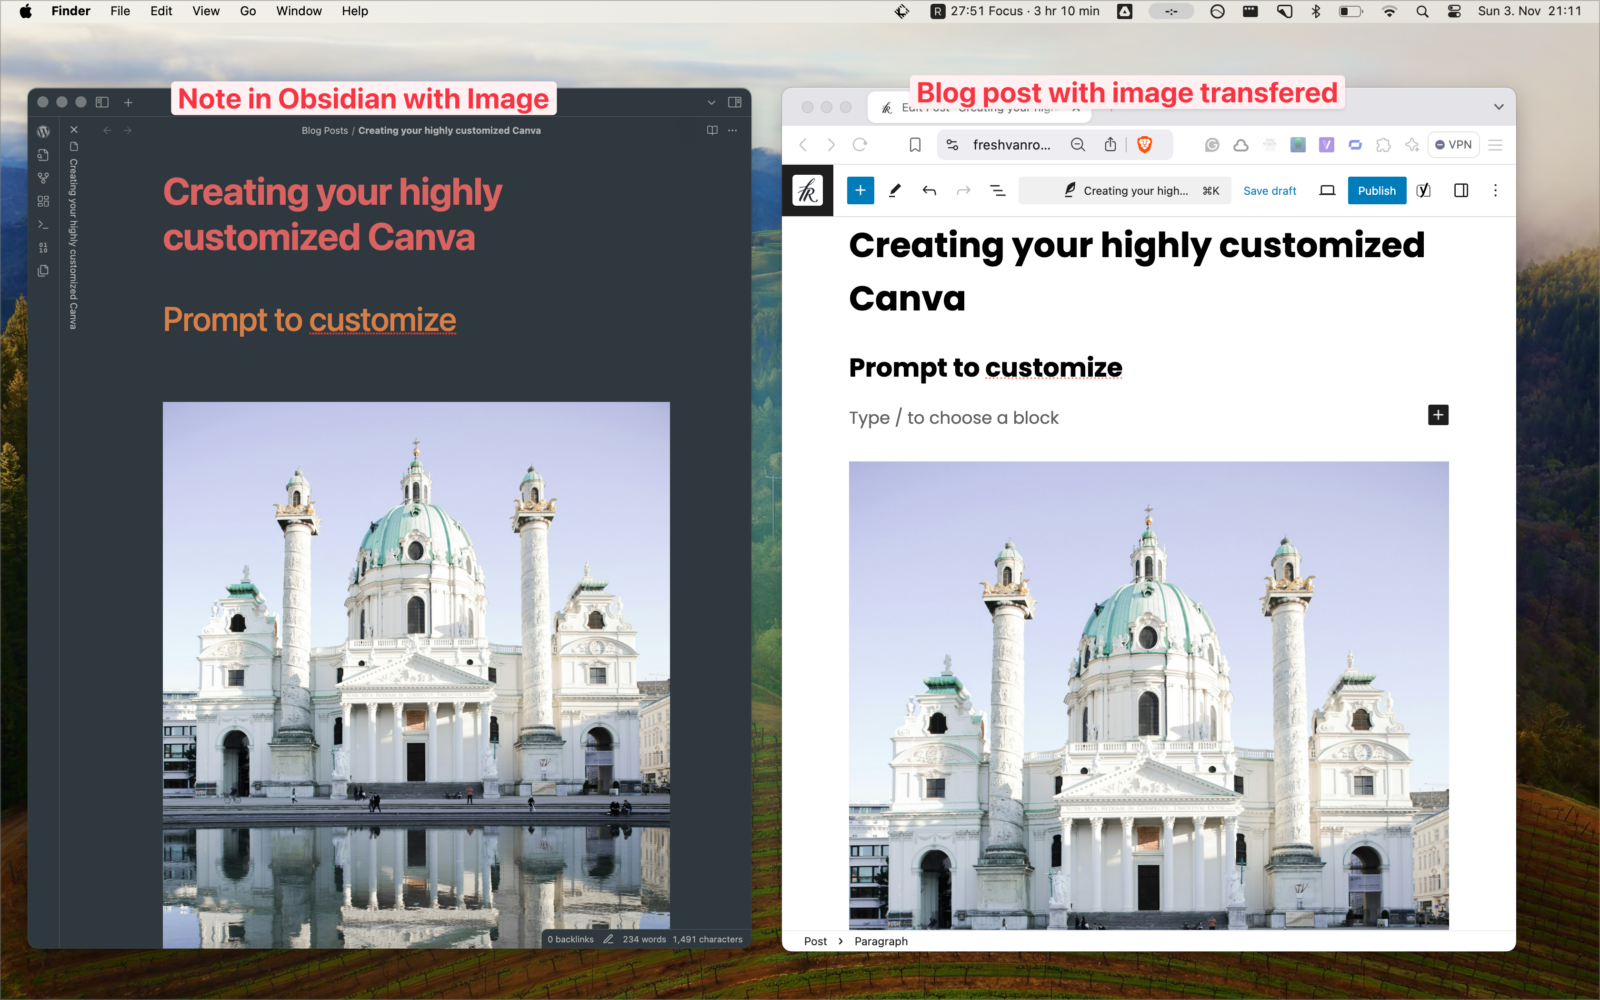
It does not transfer your images that are embedded in Obsidian. I use Obsidian to write my drafts and continue editing in WordPress. I only add images in WordPress.
In the latest version of the plugin, you can transfer your images from Obsidian to WordPress. Just beware that if you have many images in your post and/or the size of the images is above 1MB the publishing from Obsidian to WordPress can take more than a few seconds. This depends of course on your upload speed (internet connection) and site speed of WordPress.
You can’t see your edits from WordPress in Obsidian
Every time you publish a note from Obsidian to WordPress, a new post is created in WordPress.
So I recommend you only publish from Obsidian to WordPress when you are nearly finished and continue editing your post in WordPress.
Conclusion
For bloggers that write text-heavy blog posts, this is a good recipe. Obsidian gives you a distraction-free writing experience.
This community plugin is basic but I am thankful it exists, it is reliable.
I wrote about 20 posts that way (including this one). I usually draft the ugly first draft of post in Obsidian, and then continue working on it here on the site.


